Table of Contents
Archived post - content may be outdate
Motivation
With the integration capabilities of Power Automate, your Power Virtual Agents-based (voice-) bots can take the next step in your digital customer service journey. Using CRM data can be used to make automated voice bot conversations more personal and relevant to your customer. There is no need to annoy your customer and ask for details you already know. Automating repetitive processes frees human experts to take care of more complex tasks and customer interactions. Power Virtual Agents is not just another chatbot platform. It is part of a whole ecosystem with frontend, backend, and middleware layers to help you to do #morewithless and to speed up your digitalization journey.
SharePoint List as a data source
In this guide, I will use a simple SharePoint list as a data source for your bot’s “CRM” Data. Other data sources can be used accordingly.
Create a simple list with the following columns:
title, name, surname, phonenumber, customernumber

Figure 1: Create a list in SharePoint
Power Automate flow to fetch customer data
Next, we create a new Power Automate flow to fetch the calling customers’ data from the list; we use the caller’s phone number - we already extracted it from the channel data - as input for the flow.
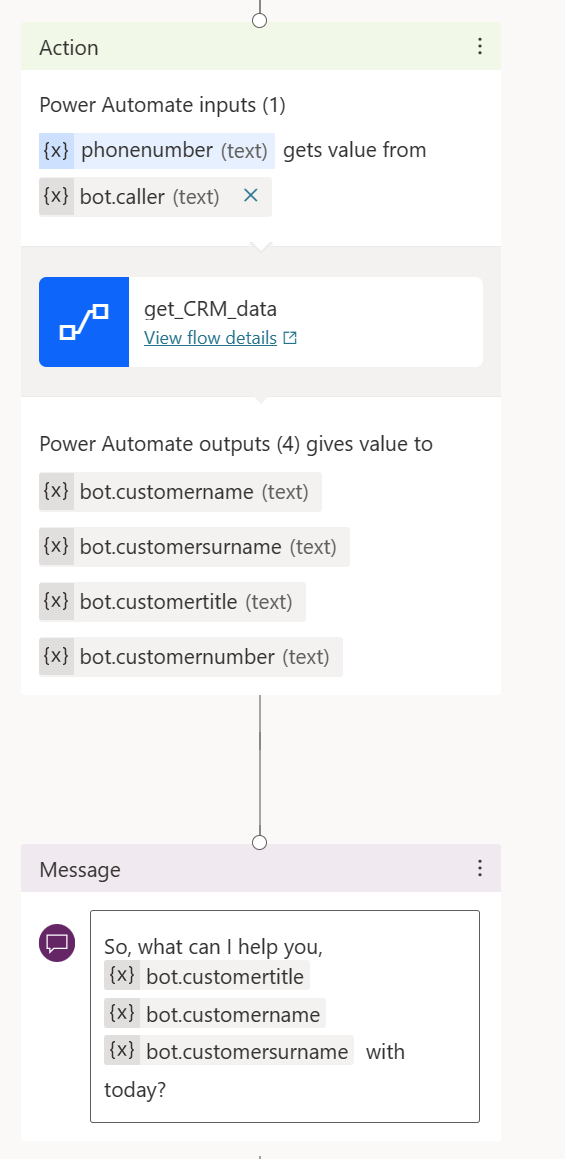
Figure 2: Create an action node with input and outputs
First, we define “phonenumber” as an input in Power Automate

Figure 3: Input variable
Next, we initialize four variables as temporary storage for our CRM data.
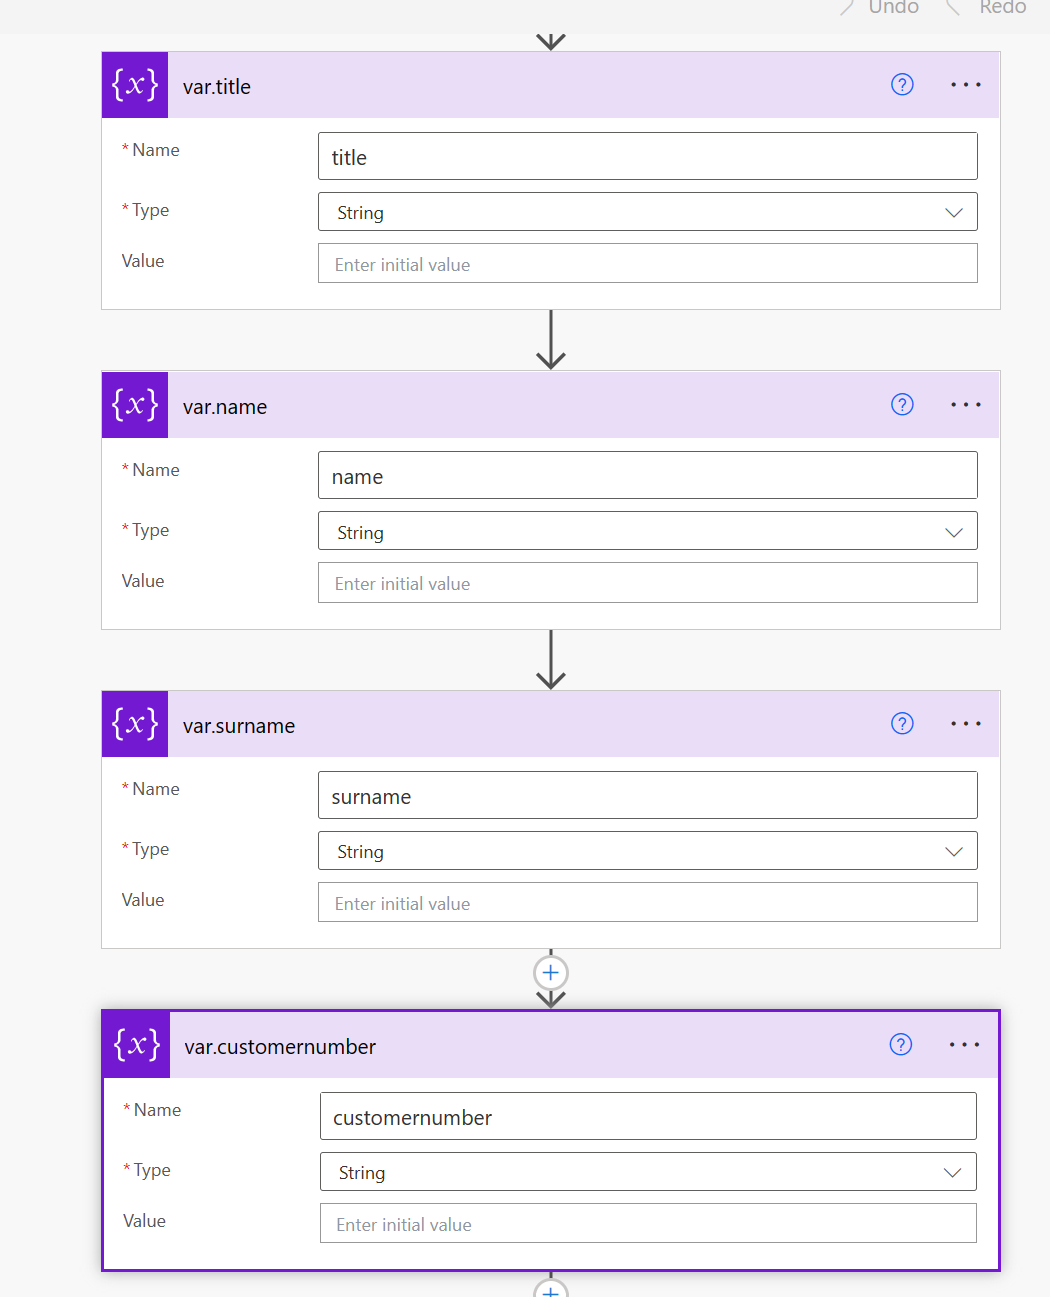
Figure 4: Create four variables
Next, the “get details from (SharePoint) list” action fetches the calling customers’ data.
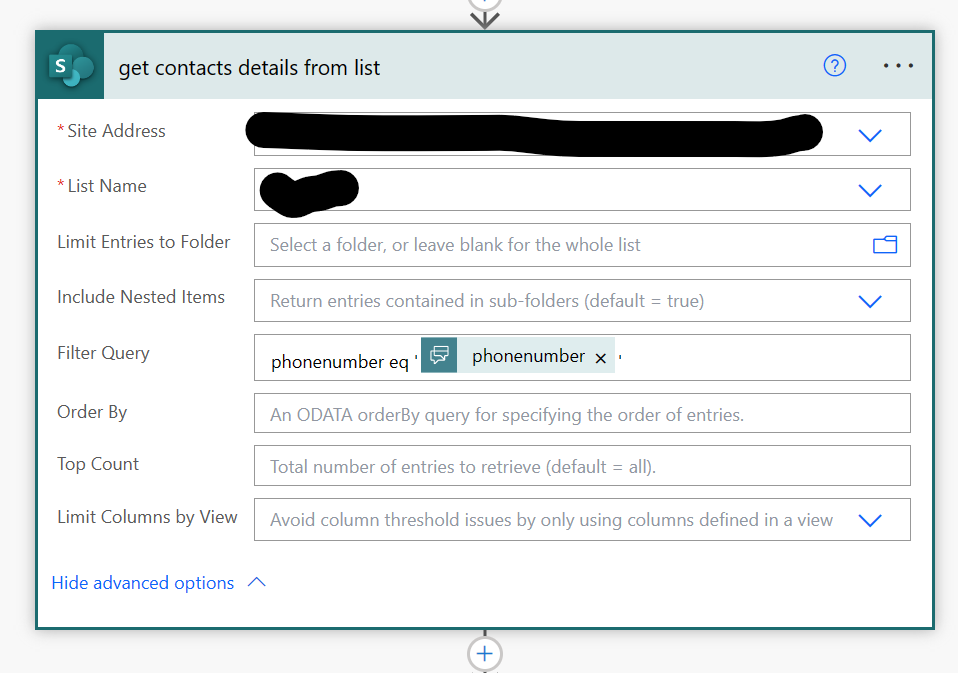
Figure 5: Get data from the SharePoint list
The Filter Query is to select the data of the calling customer. We use the phone number as an index.
phonenumber eq 'phonenumber'
 "value": [
      {
        "@odata.etag": "\"2\"",
        "ItemInternalId": "3",
        "ID": 3,
        "Title": "Mr",
        "name": "Holger",
        "surname": "Imbery",
        "phonenumber": "+49xxxxxxxxx",
        "customernumber": "4477",
        ....

}
]
The array we get as an output of that step will be used to append the created variables via “Apply to each”.
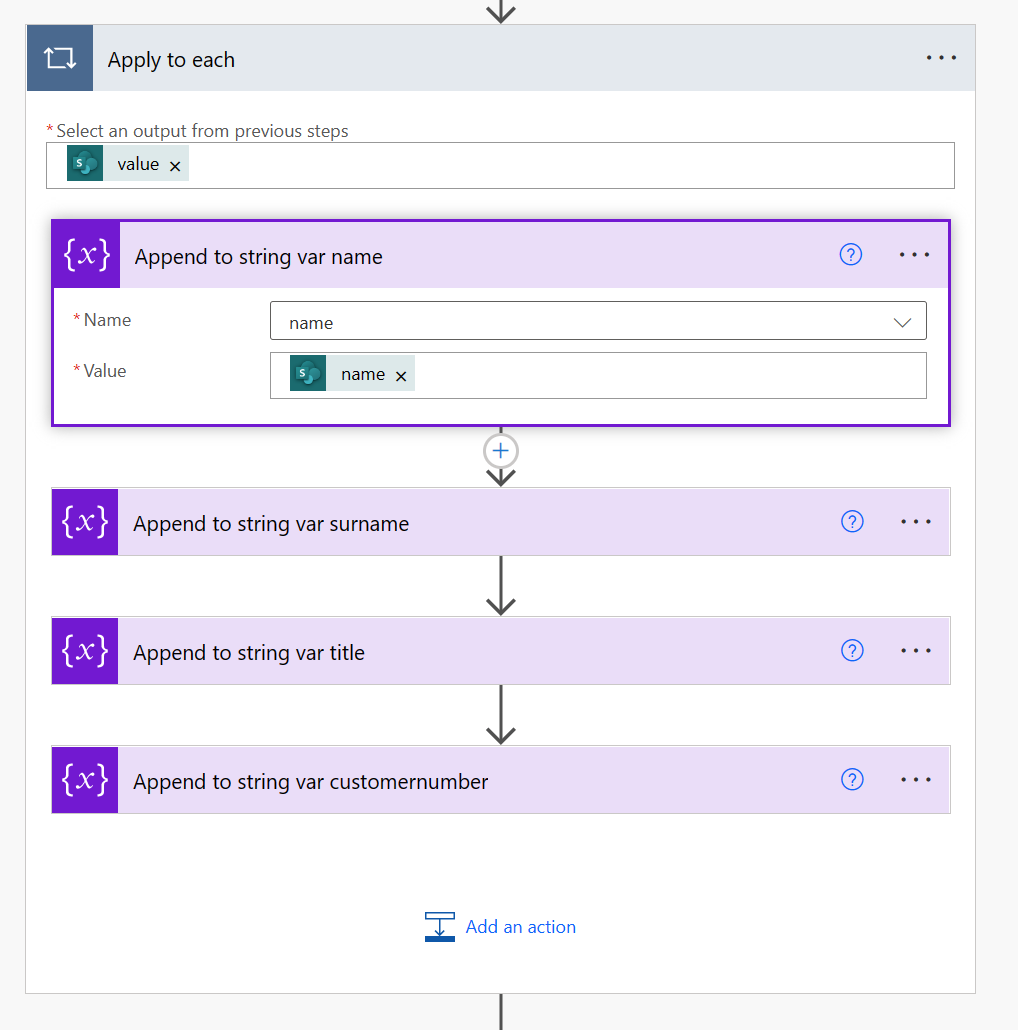
Figure 6: store SharePoint list data in string variables
Usage of CRM Data
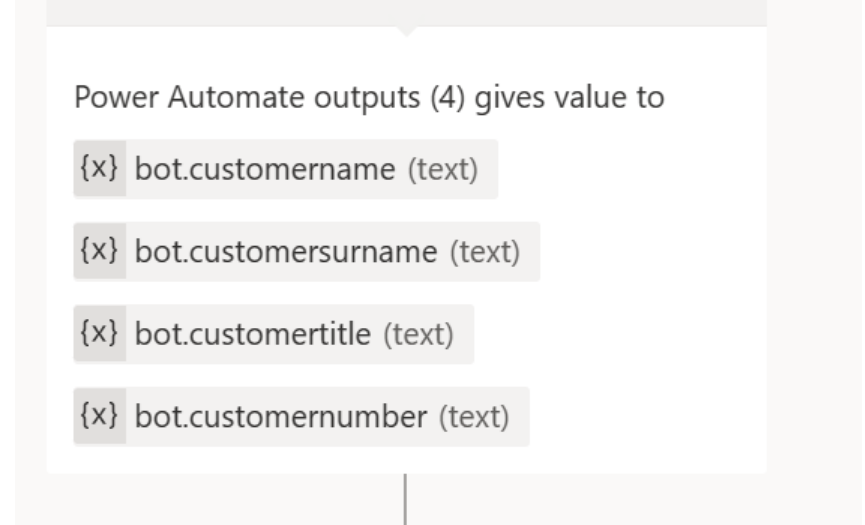
Figure 7: make data globally visible
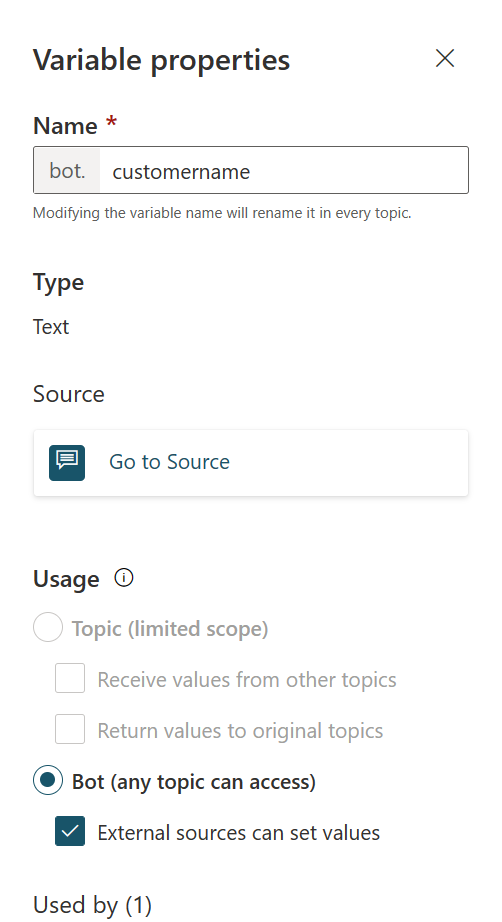
Figure 7.1: make data globally visible
The data we acquired from our SharePoint list is stored in “bot.” variables; therefore, the variable and its content are available globally. It can be used in every (new) topic.
There is no need to ask for the following:
-
name,
-
surname
-
title
-
phone number
-
customer number
-
or all other information you find in your data sources.
You can use speaker verification systems like Nuance Gatekeeper or Phonexia Voice Verify to verify the user’s identity. You will then have two factors, Caller ID and confirmed identity via voice.


Start the conversation