Table of Contents
After thoroughly examining the insights from my comprehensive article on the ‘build versus buy’ dilemma, you’ve reached a strategic decision to embark on constructing a bespoke chatbot. This decision is rooted in the desire to harness the capabilities of a Large Language Model (LLM) while integrating it with your wealth of proprietary data. By utilizing Azure AI Studio as the foundational platform, you’re setting the stage for a chatbot that is not only equipped with advanced natural language processing abilities but also deeply customized to reflect your organization’s unique knowledge and data. This tailored approach ensures that the chatbot will serve as a highly effective digital representative, capable of engaging in meaningful interactions and delivering precise, data-driven insights directly aligned with your business objectives.
Embarking on the journey of creating a chatbot using Azure AI Studio is an innovative endeavor that empowers you to craft a highly personalized conversational agent. This process involves leveraging your proprietary datasets as a dynamic knowledge base, which is instrumental in delivering interactions that are not only personalized but also profoundly resonant with the context of each user’s needs. Azure AI Studio provides a robust framework that enables you to build a chatbot endowed with the ability to comprehend and process natural language effectively.
More than just understanding user queries, this chatbot can delve into the unique trove of information your data represents, providing responses tailored for the specific nuances and insights contained within. This means that every interaction with the chatbot is informed by a deep understanding of the content, history, and intent behind the data, allowing for a level of service that feels intuitive and bespoke to each user.
By building with Azure AI Studio, you’re not just creating a chatbot; you’re architecting a sophisticated digital assistant that reflects the depth and breadth of your organization’s knowledge, ready to engage users with precision and relevance.
Your prompts (inputs) and completions (outputs), your embeddings, and your training data:
- Are NOT available to other Microsoft customers.
- Are NOT available to OpenAI.
- Are NOT used to improve OpenAI models.
- Are NOT used to improve any Microsoft or 3rd party products or services.
- They are NOT used for automatically improving Azure OpenAI models for your use in your resource (The models are stateless unless you explicitly fine-tune them with your training data).
- Your fine-tuned Azure OpenAI models are available exclusively for your use.
Microsoft fully controls the Azure OpenAI Service. Microsoft hosts the OpenAI models in its Azure environment, and the Service does NOT interact with any services operated by OpenAI (e.g., ChatGPT or the OpenAI API). Please also see the Microsoft Products and Services Data Protection Addendum, which governs data processing by the Azure OpenAI Service except as otherwise provided in the applicable Product Terms.
This detailed guide delves into deploying a sophisticated enterprise-level chat web application. This application is uniquely designed to integrate seamlessly with your curated datasets, utilizing a state-of-the-art large language model within Azure AI Studio’s advanced ecosystem.
The essence of this integration lies in the concept of ‘grounding’ the model with your data. Grounding is a pivotal process where the model actively references your specific datasets to understand the context surrounding each query it encounters better. This is not to be mistaken for modifying the model itself; rather, it enhances the model’s contextual awareness.
Your data remains intact and stored securely in its original repository, cloud storage, or database. The chat application dynamically accesses this data during interactions, ensuring that the responses generated are accurate and highly relevant to the nuances of your organizational knowledge and user inquiries. This approach guarantees personalization and precision in the chatbot’s functionality, setting a new standard for enterprise chat solutions.
The steps in this tutorial are:
-
Step: Deploy and Test a Chat Model Without Your Data
Initially, you will deploy a baseline chat model within Azure AI Studio. This model is pre-trained on a vast corpus of general data, enabling it to understand and respond to various queries. The initial deployment allows you to evaluate the model’s core capabilities and performance without the influence of your proprietary data. -
Step: Add Your Data Once you’ve assessed the baseline model, the next phase involves incorporating your unique datasets into the system. This step is crucial as it personalizes the chat model, allowing it to draw from a knowledge base that reflects your organization’s specific information and expertise.
-
Step: Test the Model With Your Data. After integrating your data, you will conduct thorough testing to ensure that the model not only retains its initial conversational abilities but also enhances its responses with the context and depth provided by your data. This testing phase is essential to fine-tune the model’s performance, ensuring it aligns with your expectations and requirements.
-
Step: Deploy Your Web App The final step is to deploy your web application, which is now powered by a chat model that is intelligent and informed by your data. This deployment marks the culmination of the process, resulting in a chatbot ready to engage with users, providing them with insightful, accurate, and contextually relevant interactions based on the specialized knowledge contained within your datasets.
Deploy and Test a Chat Model Without Your Data
-
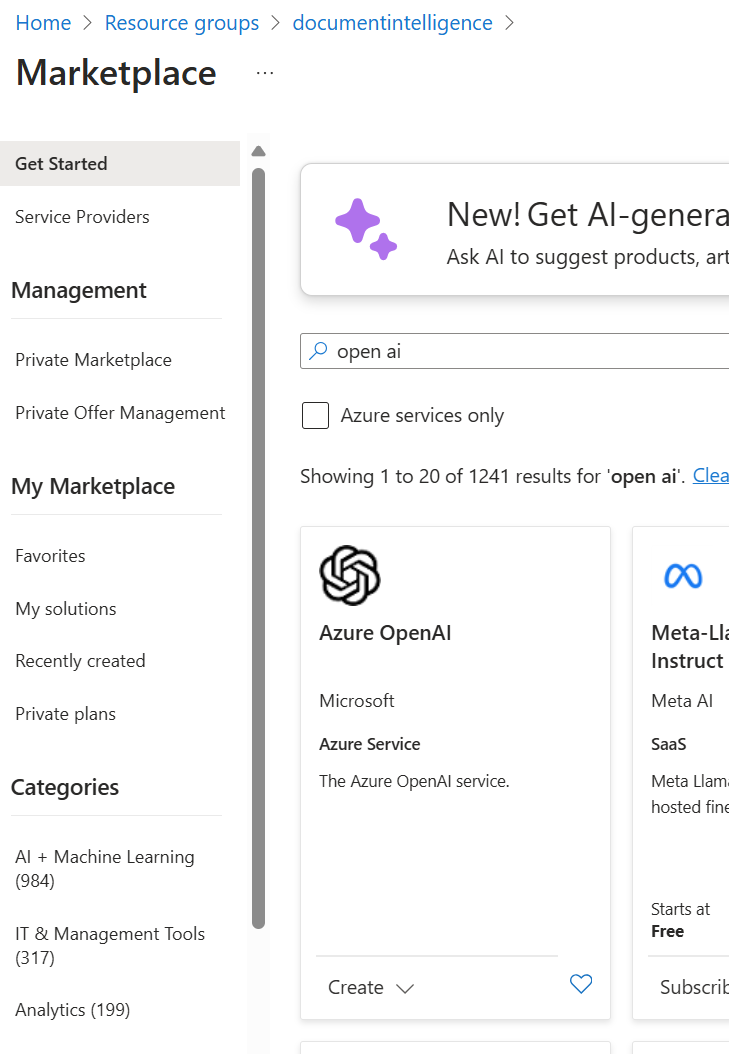
To set up a new resource group and include an Azure OpenAI Resource, begin by navigating the Azure portal. Once there, create a new resource group, then add an Azure OpenAI Resource to this group.
-
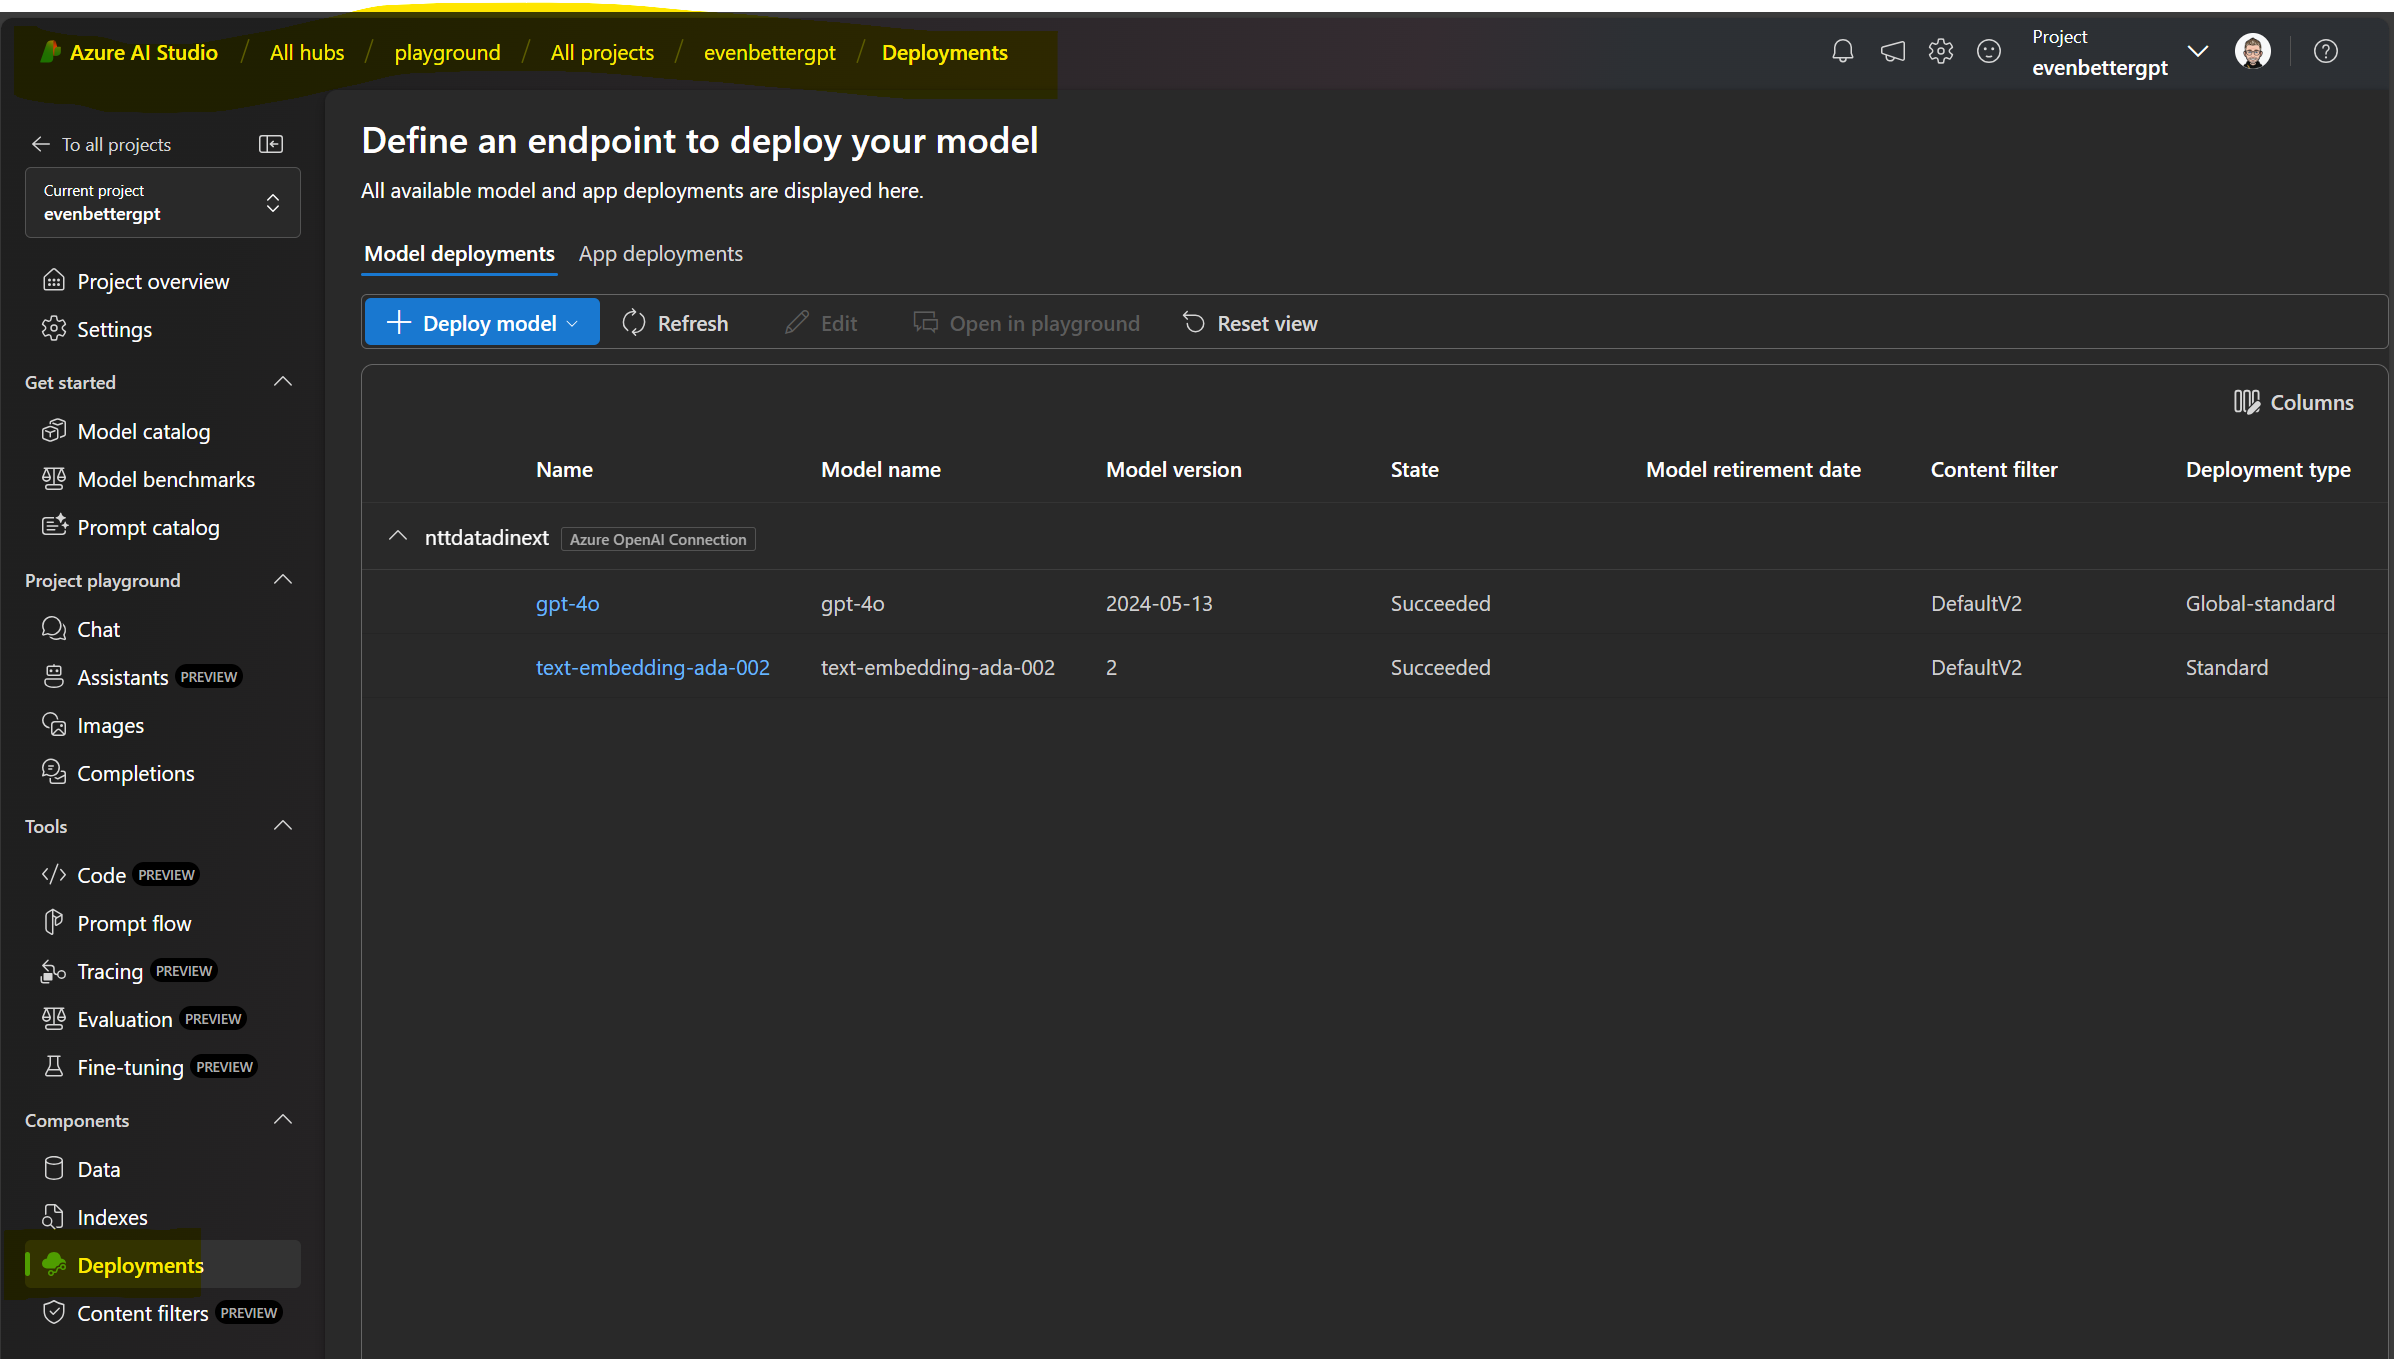
Navigate to Azure AI Studio and initiate the deployment of the large language models, provided that you have already established a hub and a project.
-
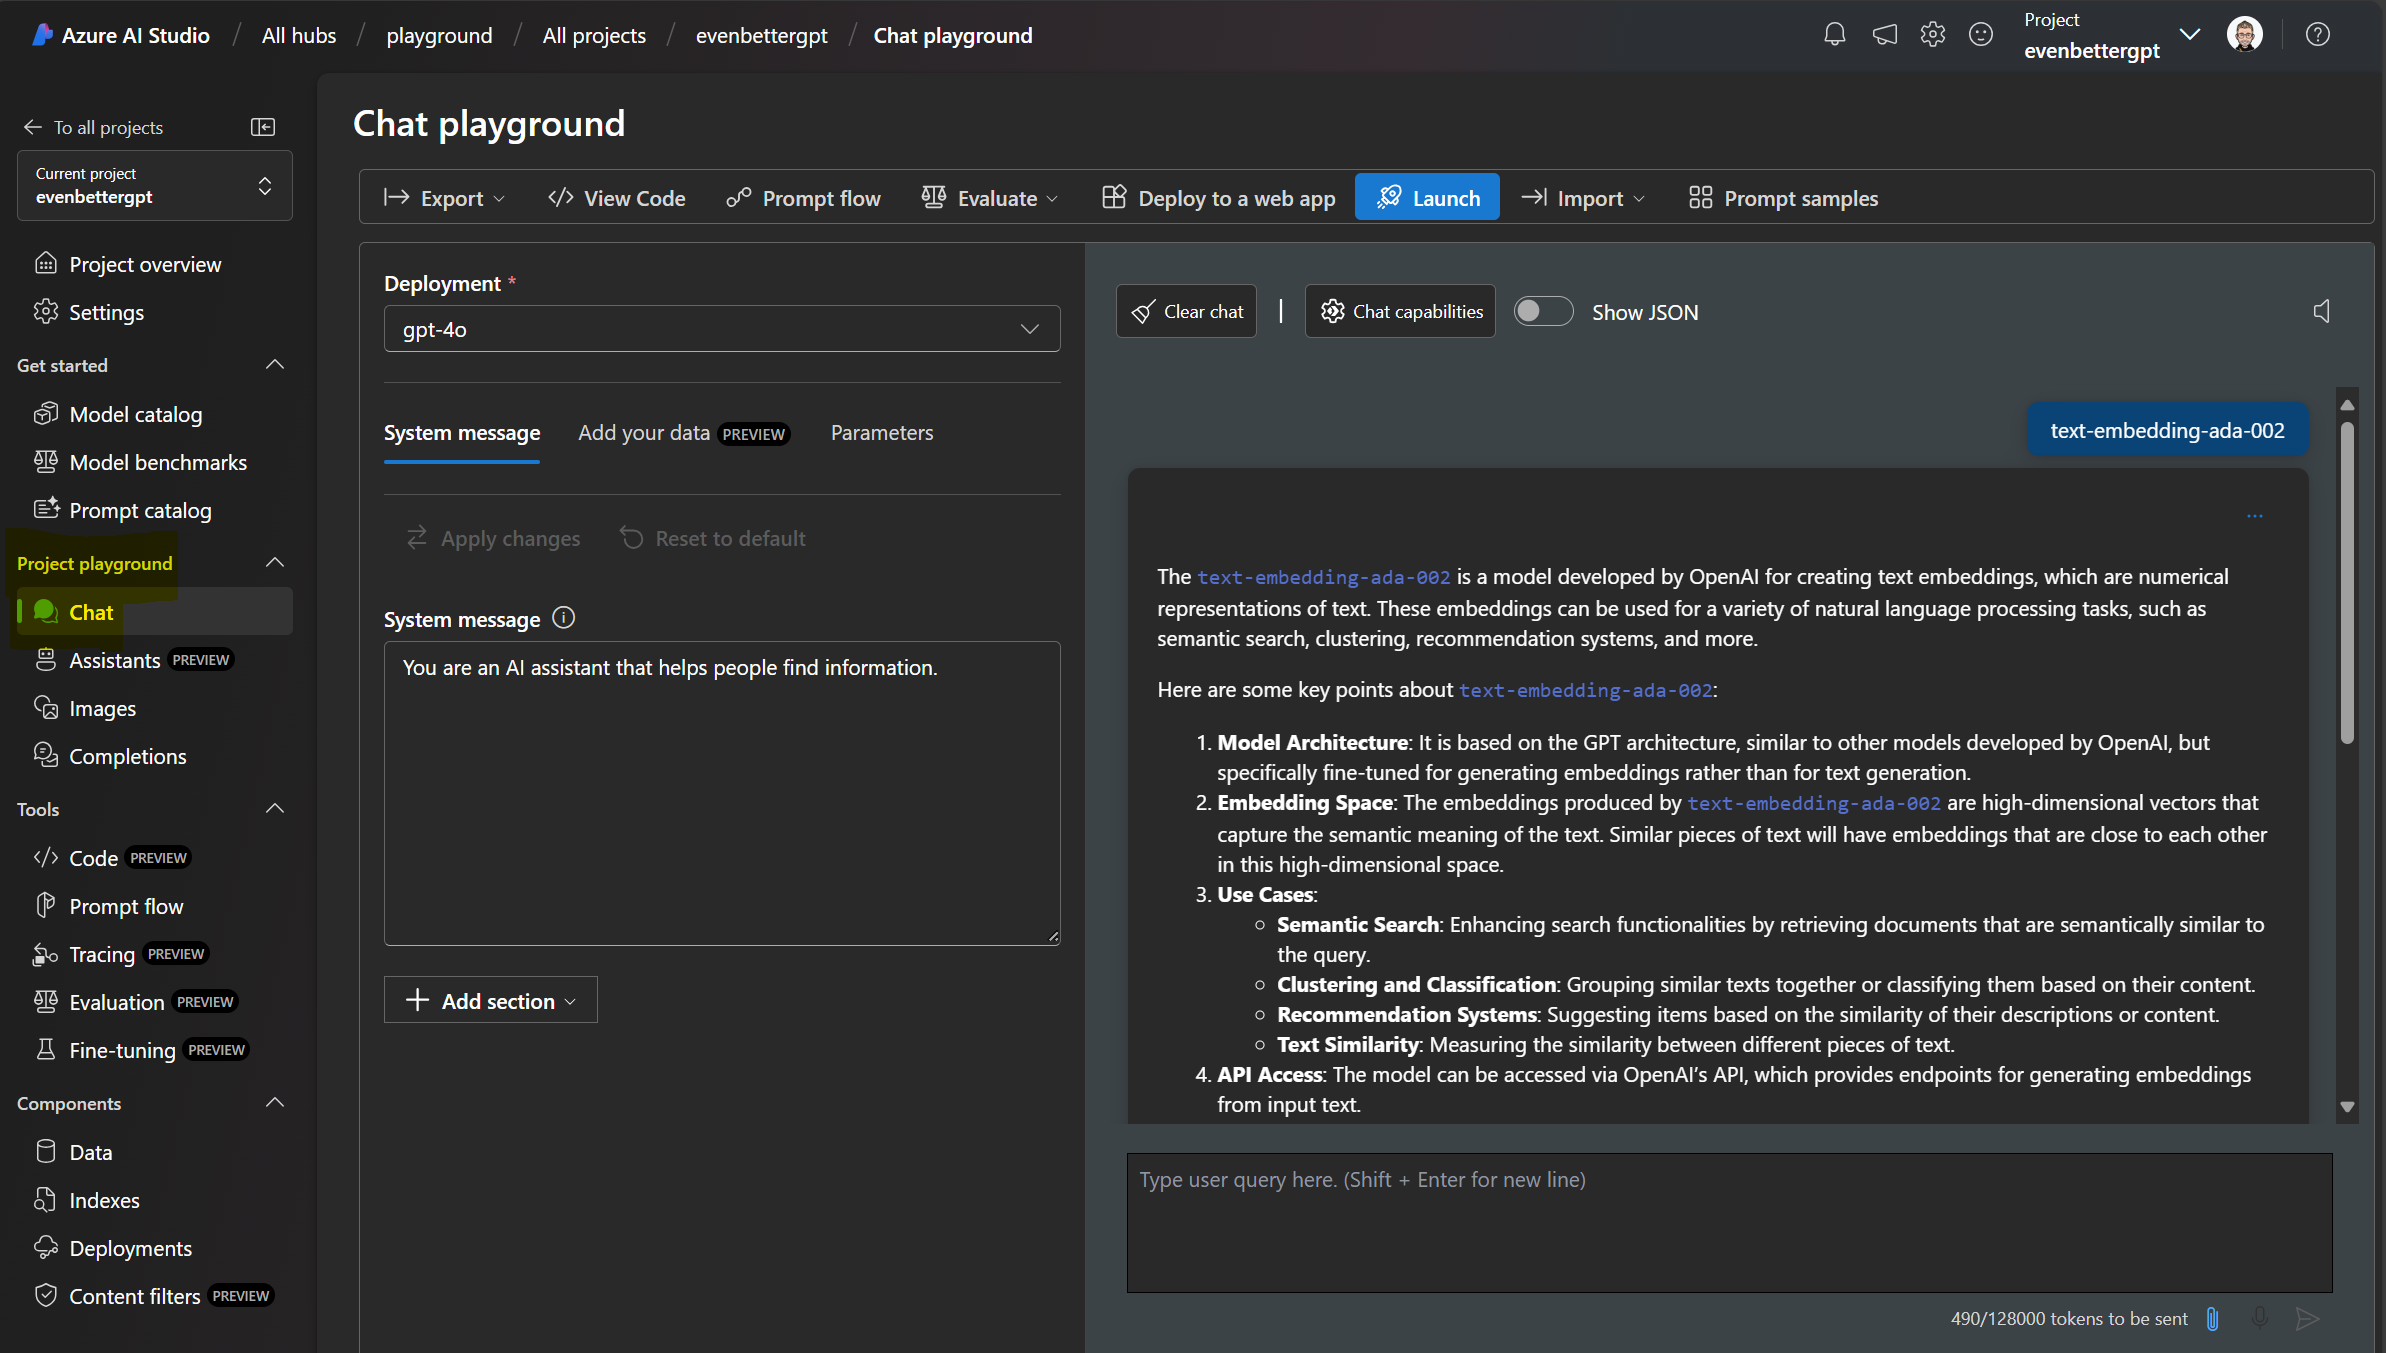
Navigate to Project Playground, select Chat, and proceed to test the model.
Add Your Data
-
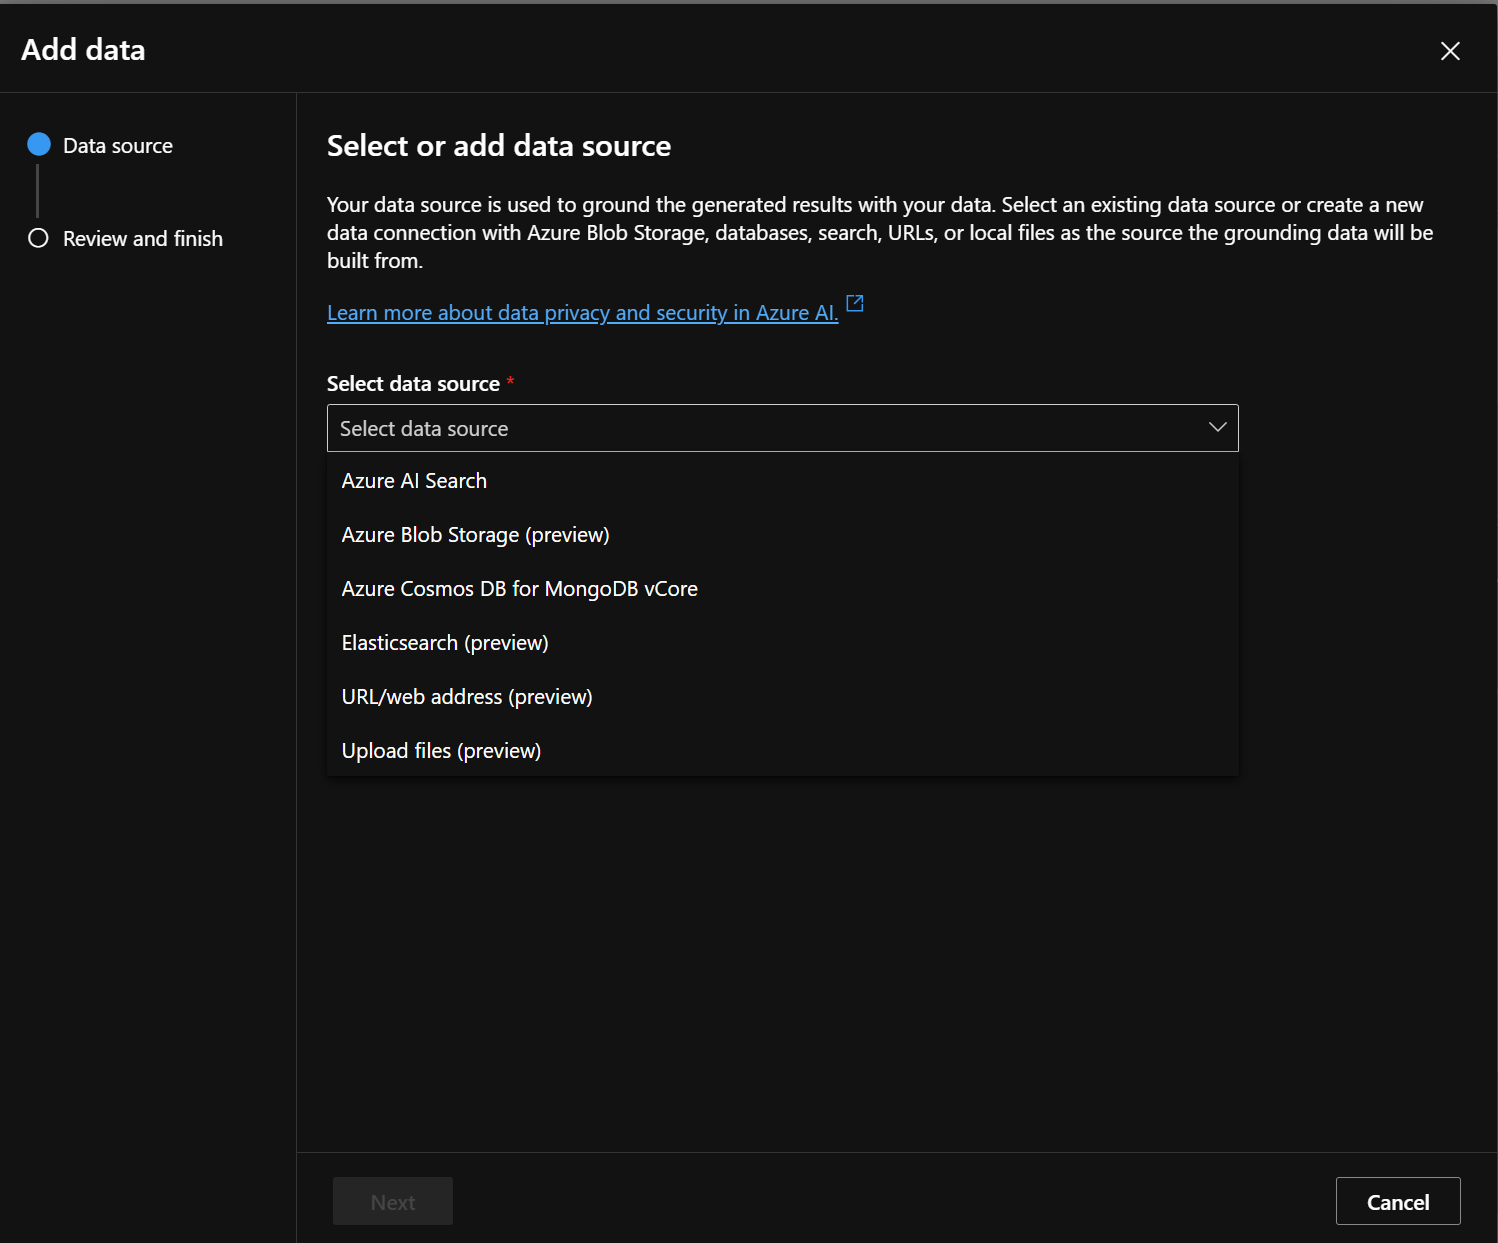
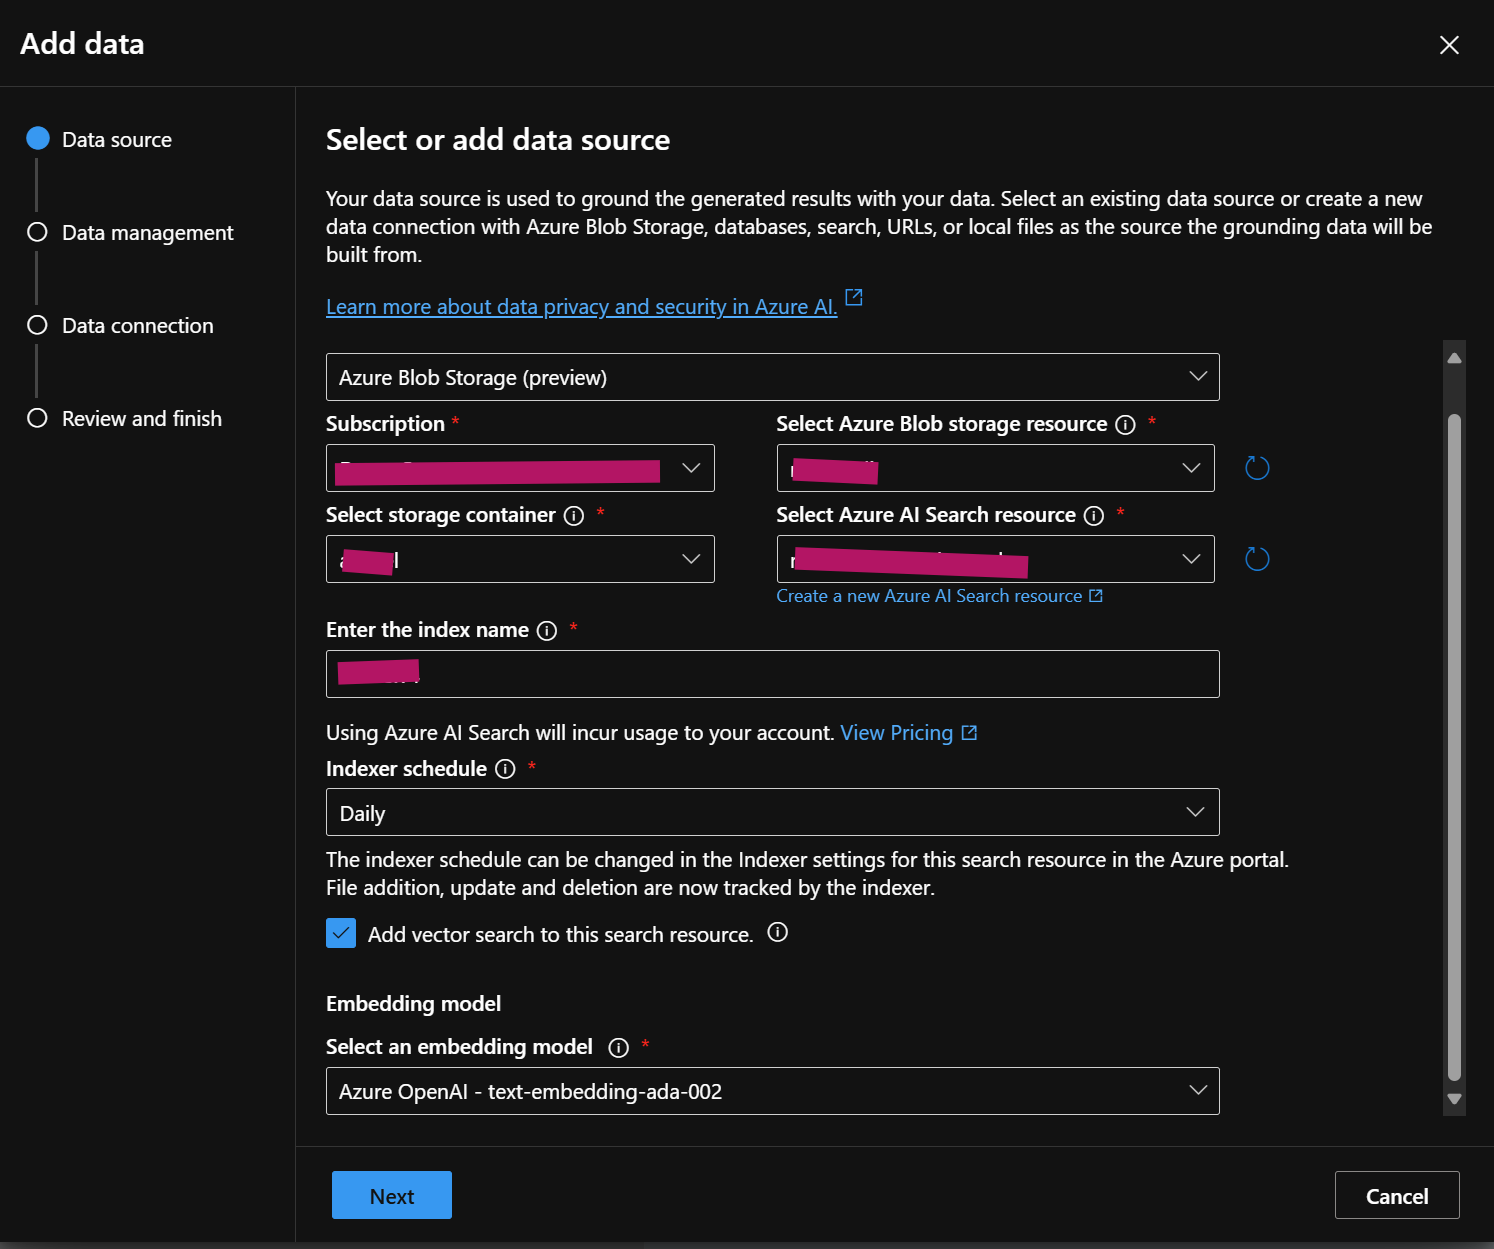
Select “Add your data” and proceed with the provided instructions.
-
Select a storage container from an existing Azure Blob Storage and choose a previously established Azure AI Search service. Assign a descriptive name to your index. You can modify the Indexer Schedule at a later time if necessary.
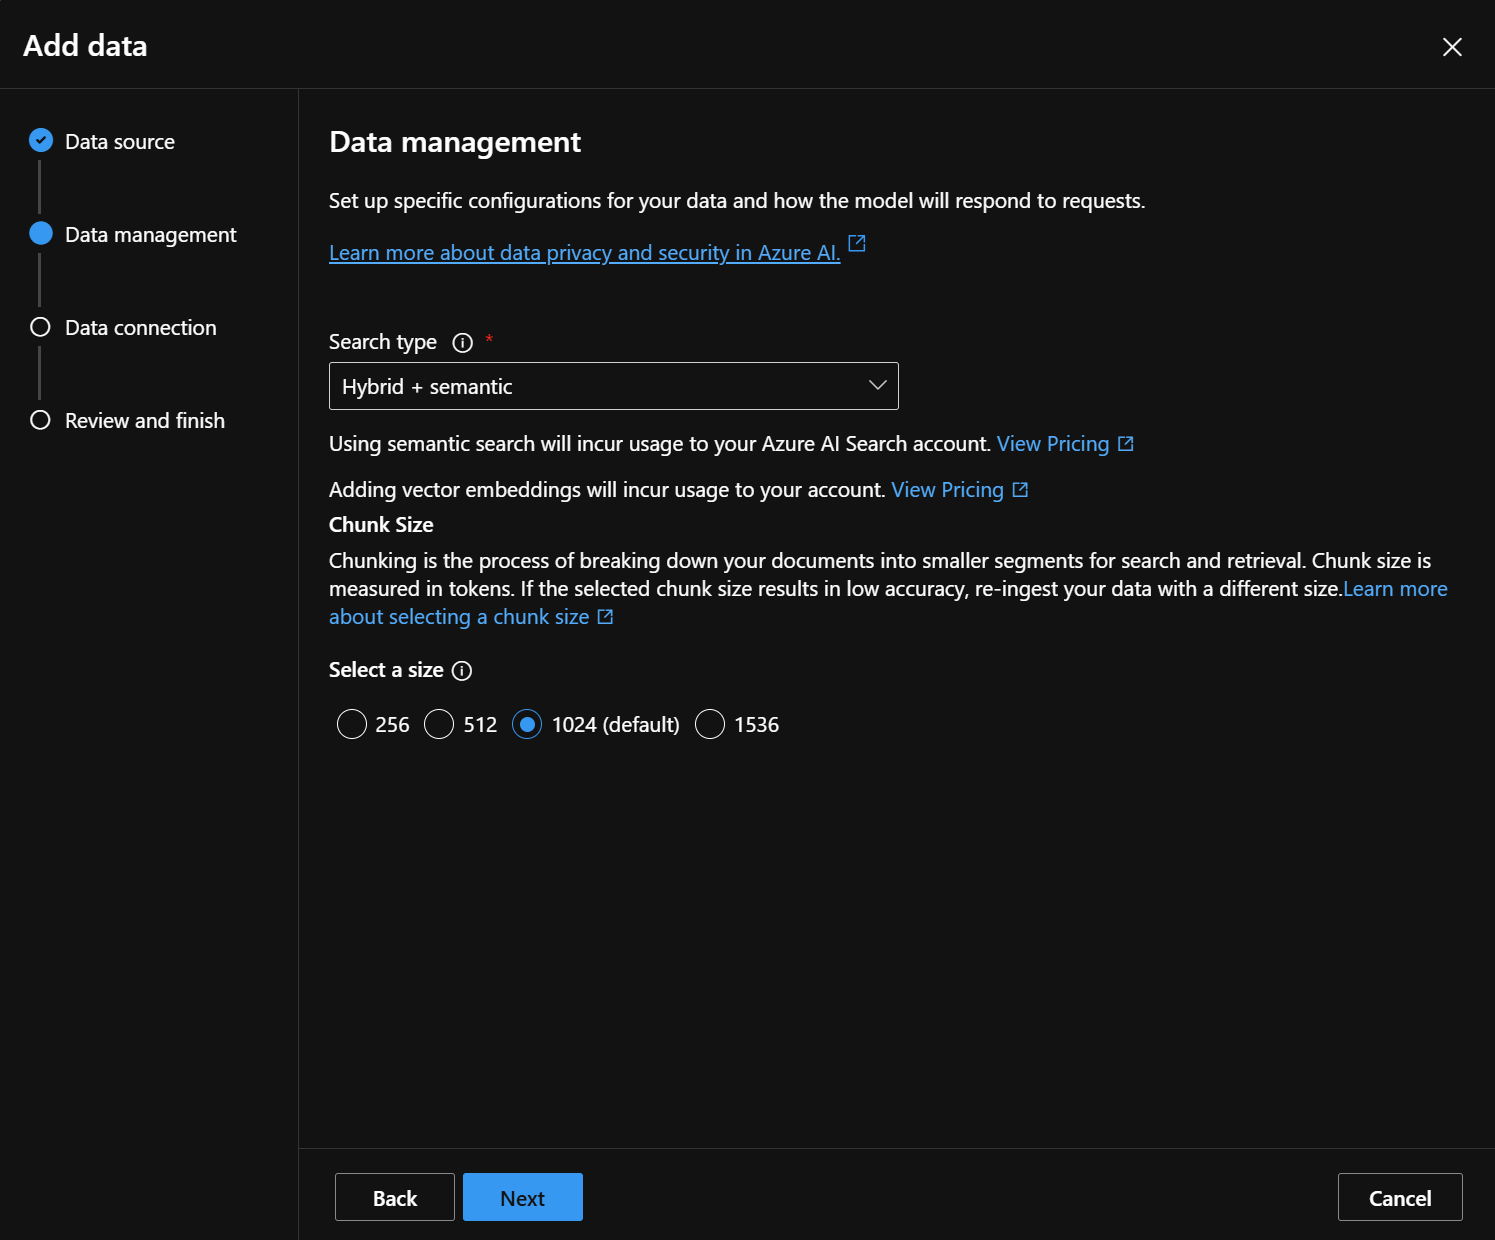
- Please choose your type of search.
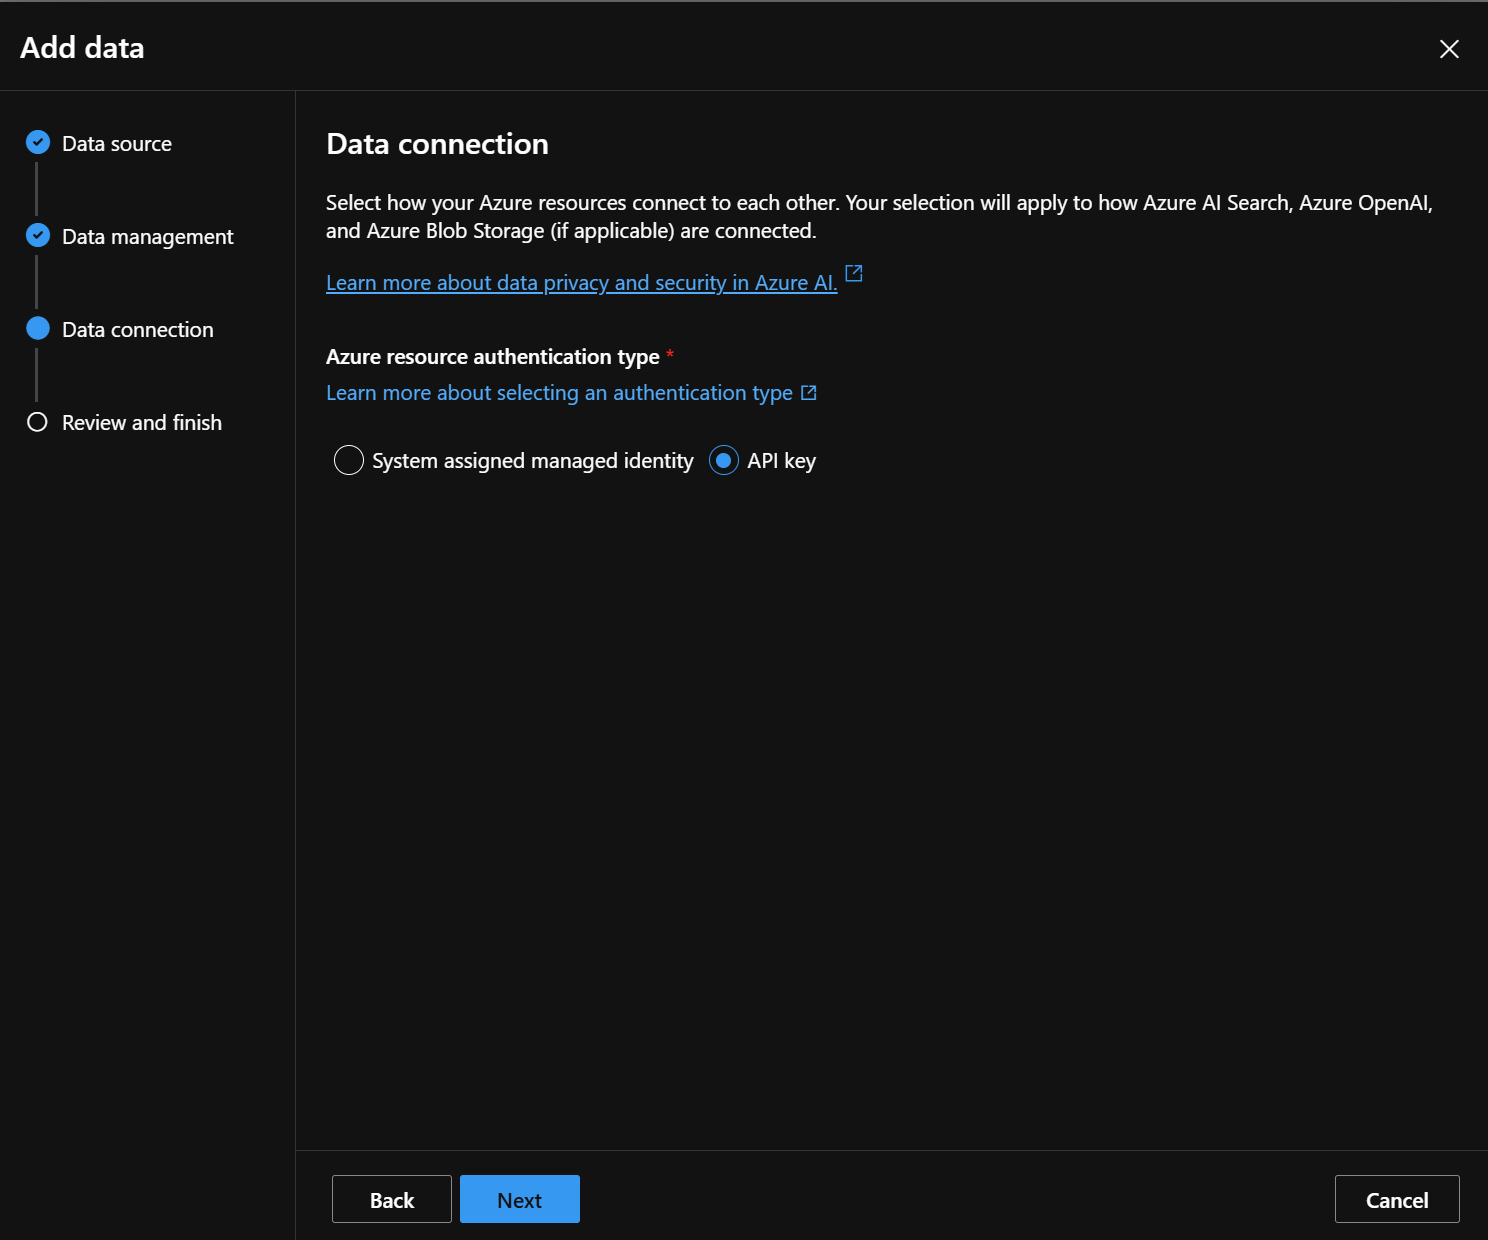
- Select the type of authentication for our system.
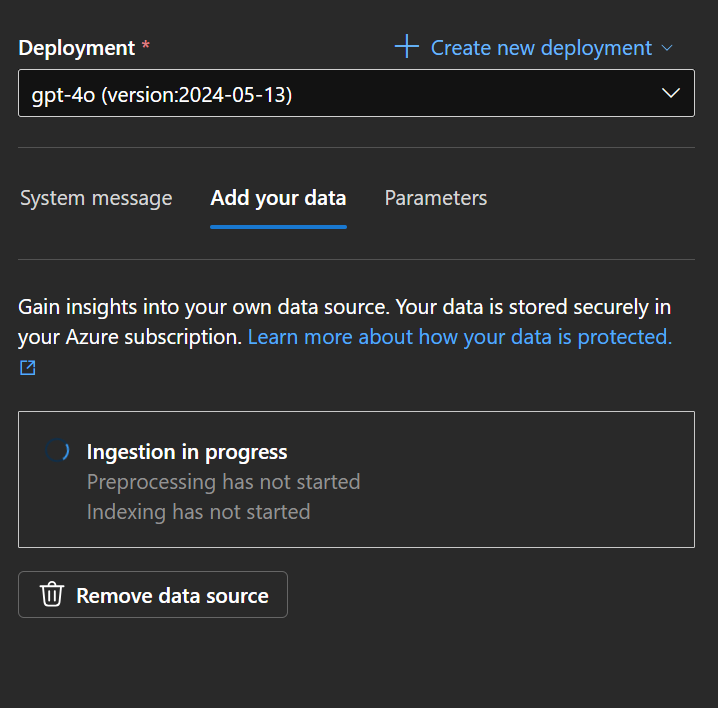
- Grab a cup of coffee or tea and hang tight—the data will be ready before your cup runs dry! :-)
Test the Model With Your Data
- Check the chat interface to see if everything works with your data.
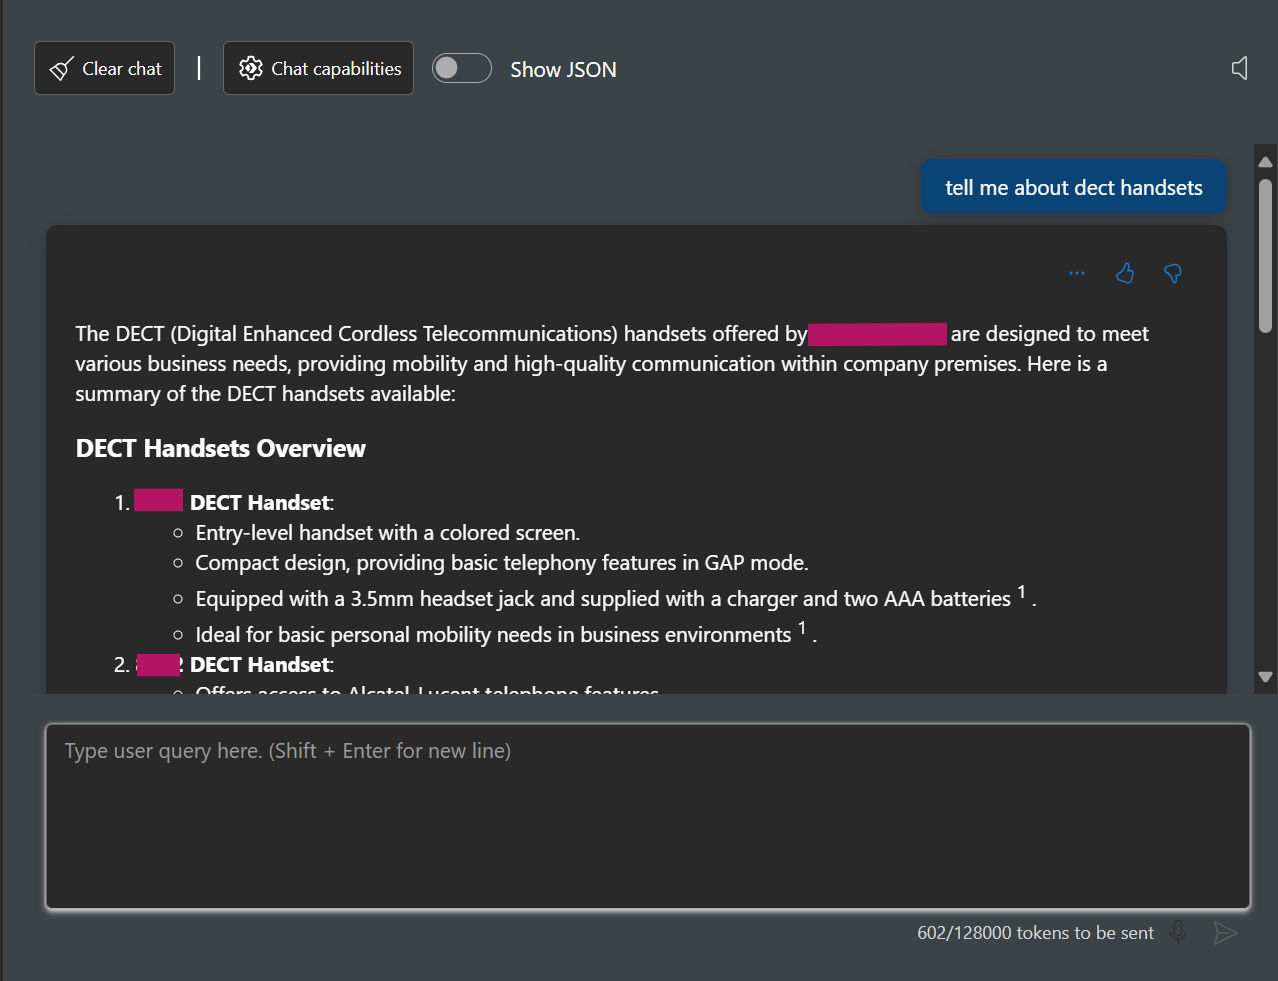
Deploy Your Web Application
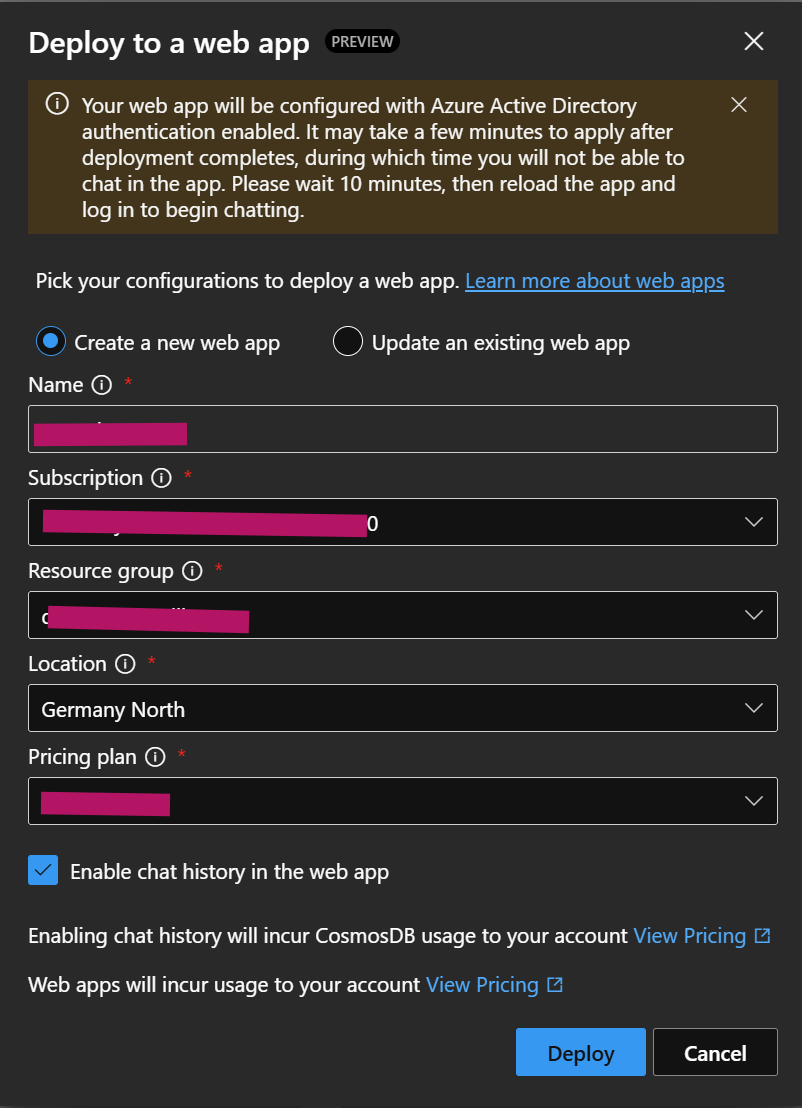
- Select “Deploy to a web app” located above the chat window.

- Create the web app according to your preferences.
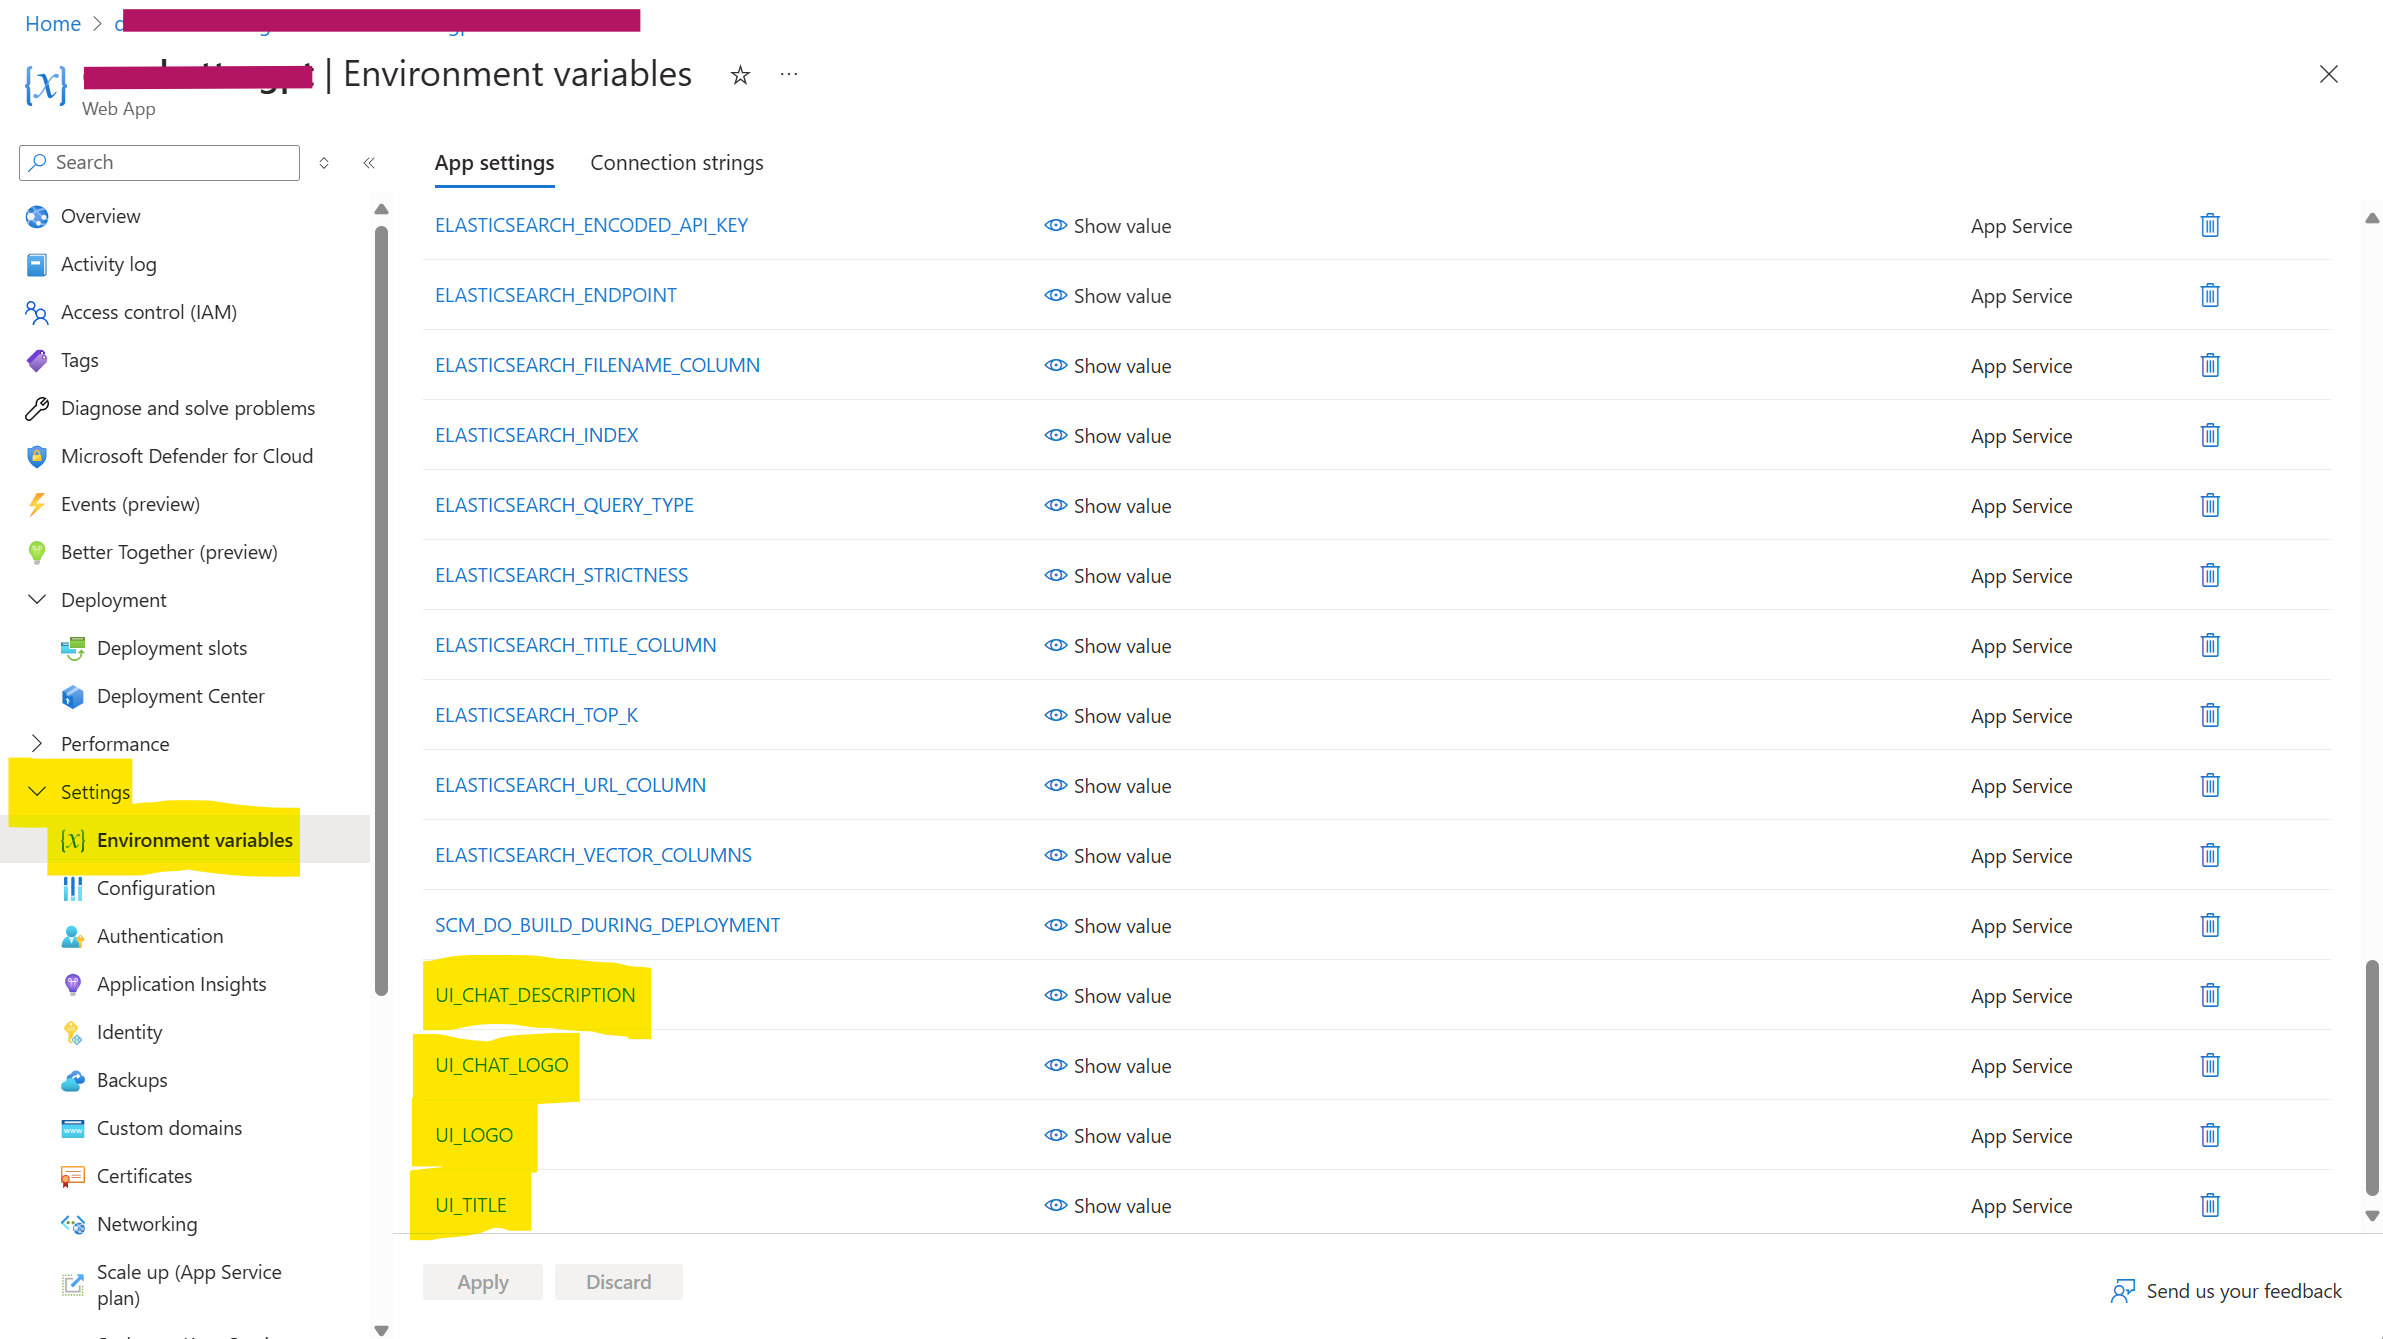
- Environment variables allow you to customize the web application to meet your requirements. Documentation and instructions for additional customizations are available on GitHub.
-
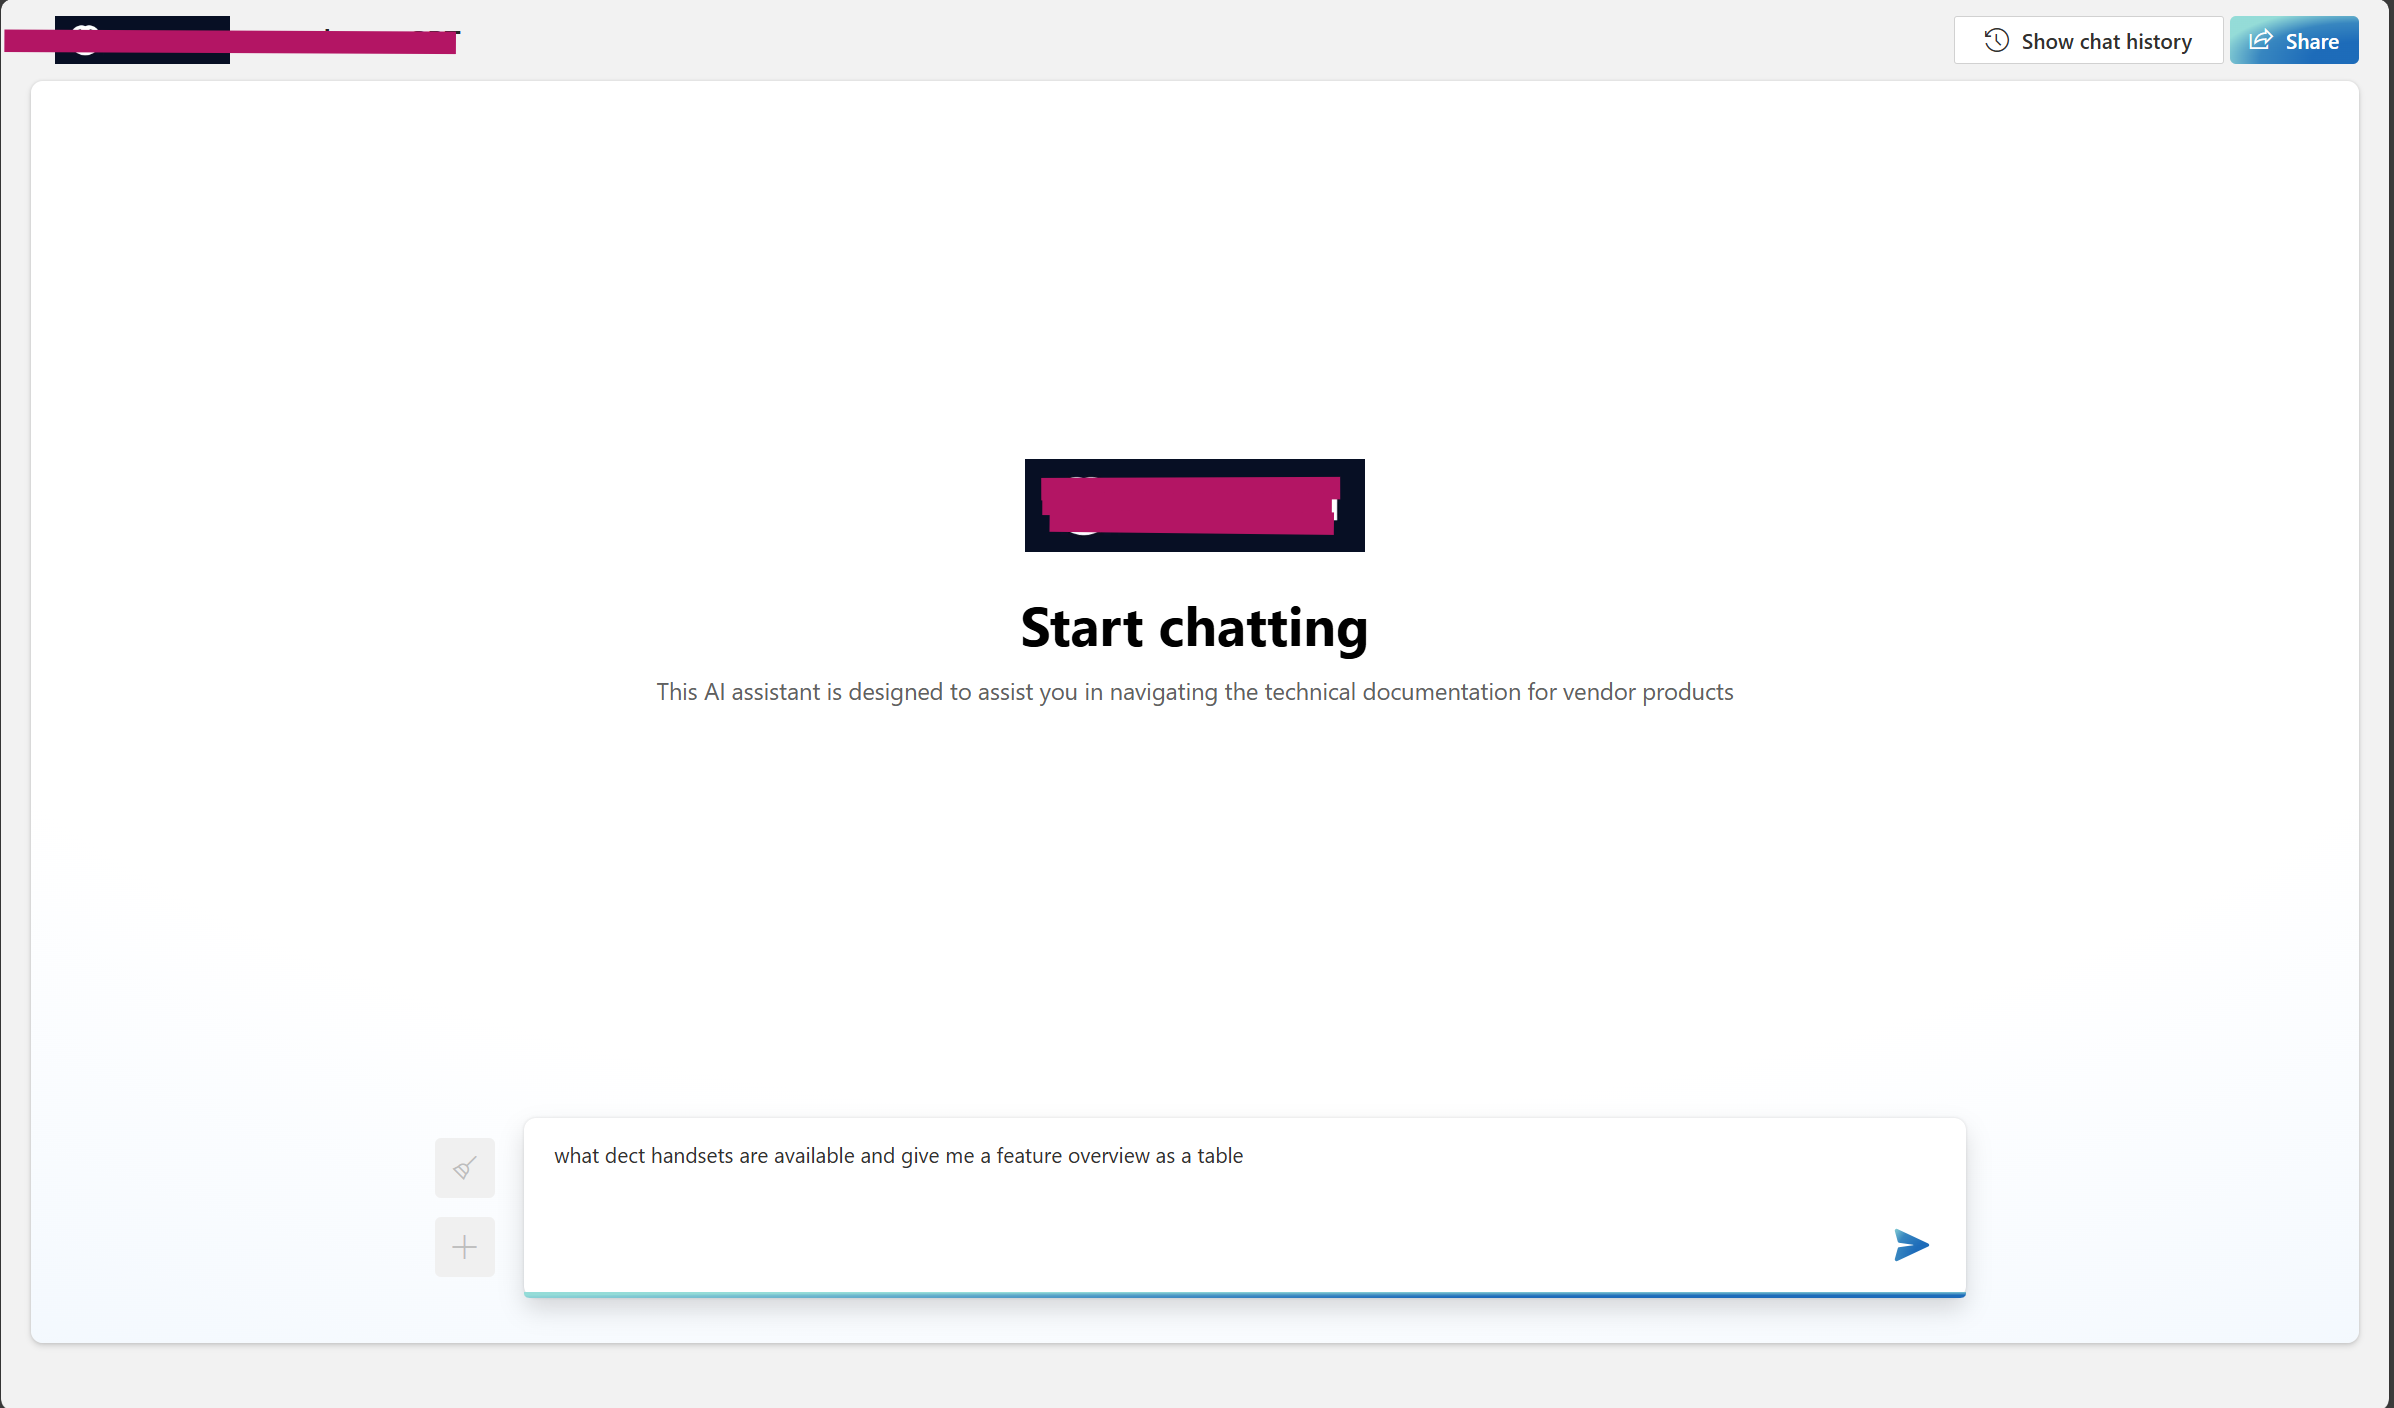
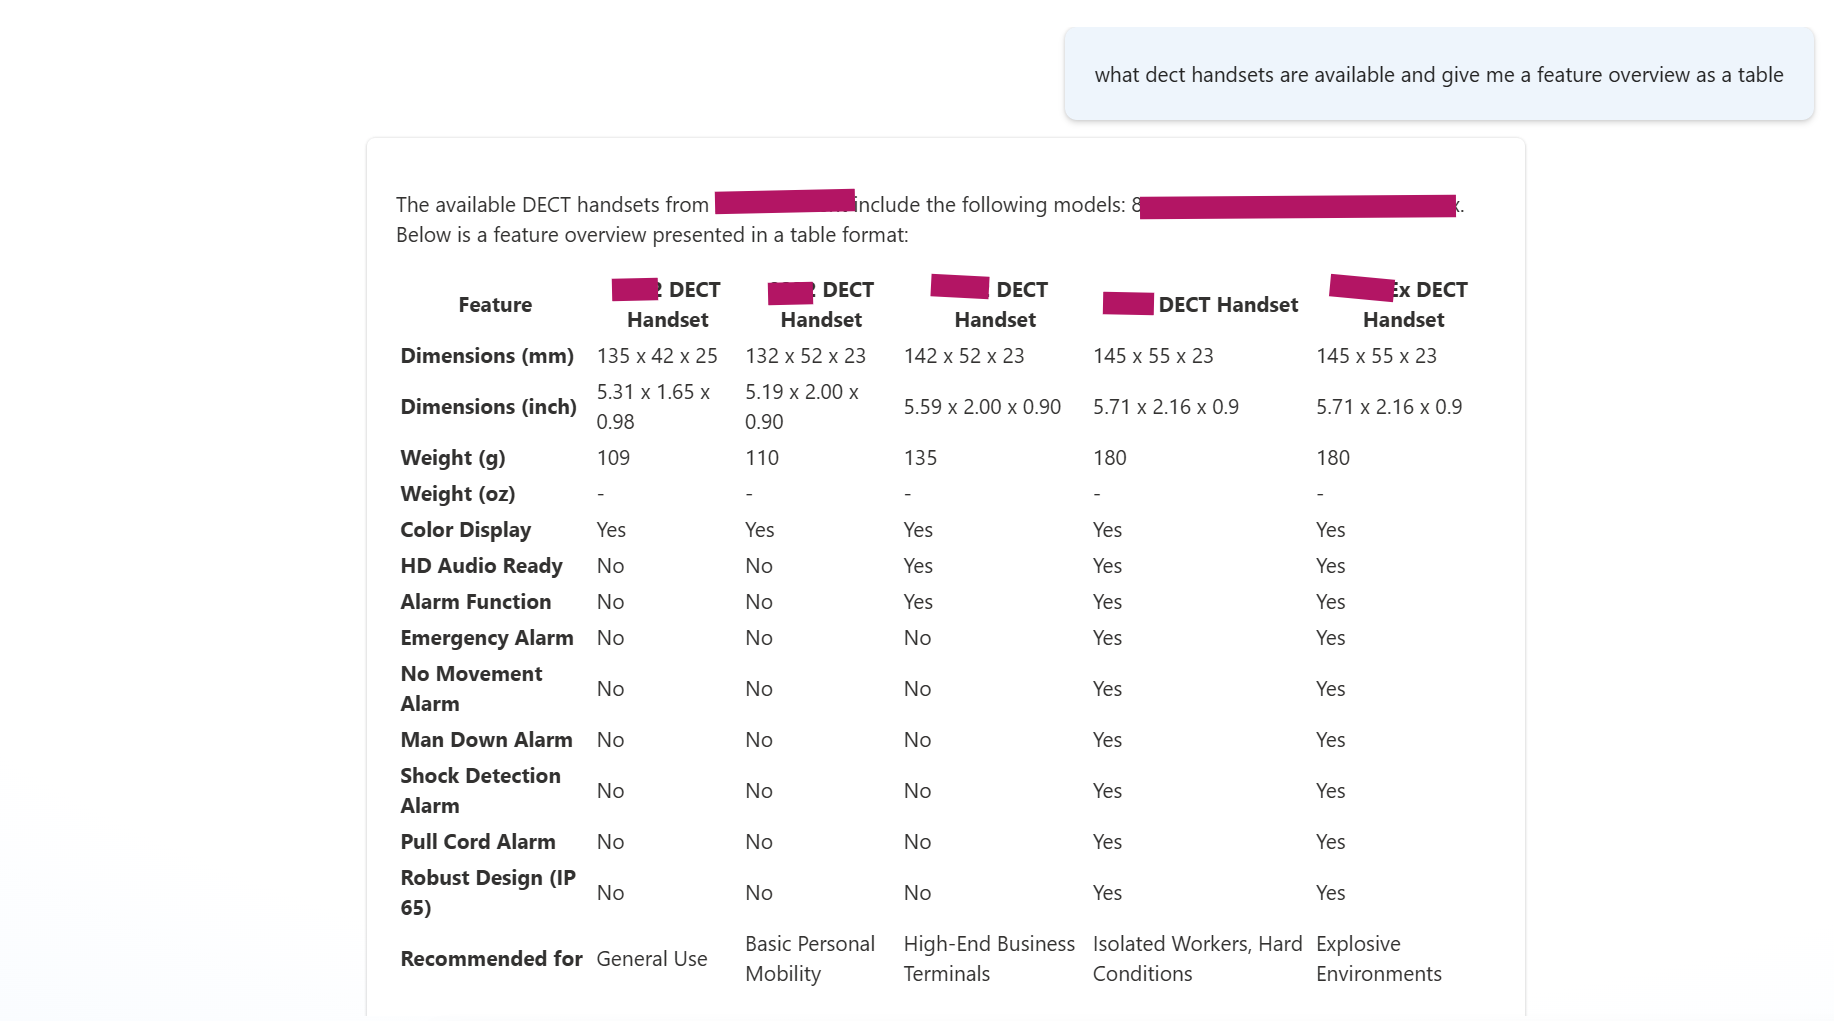
The result will then look similar to this.
Conclusion
Initiating an enterprise chat application using Azure AI Studio is a forward-thinking decision that taps into cutting-edge AI technology to forge a digital assistant that’s both highly individualized and efficient.
The process involves a sequence of steps, starting with the deployment of an initial model, then incorporating your unique data sets, evaluating the improved model, and culminating in the launch of the web application. This method ensures that your chatbot is not just intelligent but also richly informed by the distinct knowledge base of your organization. Such a strategy ensures accurate and relevant interactions to the context, thereby redefining the benchmarks for enterprise chat solutions and markedly boosting user interaction and contentment. This aligns with your decision to focus more on developing a solution than sourcing it.


Start the conversation