Table of Contents
Archived post - content may be outdate
Multilingual IVR Replacement for Dynamics 365 Customer Service (Voice Bot)
Imagine serving your customers and employees immediately in their native language, without waiting in Contact Center Queues, 24/7, with your new self-service voice bot factory. Always with a human agent as an escalation target.
Prerequisites
- Having Dynamics 365 Customer Service installed and an Application Registration in place. Please find a detailed description in my article “Dynamics 365 Customer Service with Power Virtual Agents - Part 1 (automation with text chat).”
-
Having the voice channel deployed with some phone numbers. Please find a detailed description in my article “Dynamics 365 Customer Service with Power Virtual Agents - Part 2 (automation with voice/voice bots).”
- Bot Framework Composer must be installed locally.
Architecture
The basic idea behind our concierge is to have a cascade of bots living in separate queues. Please keep in mind to always create an escalation to a human path.
We start with a selector for the language and forward the outcome to a queue for that specific language. You could create another bot for that queue or bring human agents to that queue. This mechanism can be used for a cascade of bots with different skills in several languages and can be your foundation of a bot factor in front of your human agents.
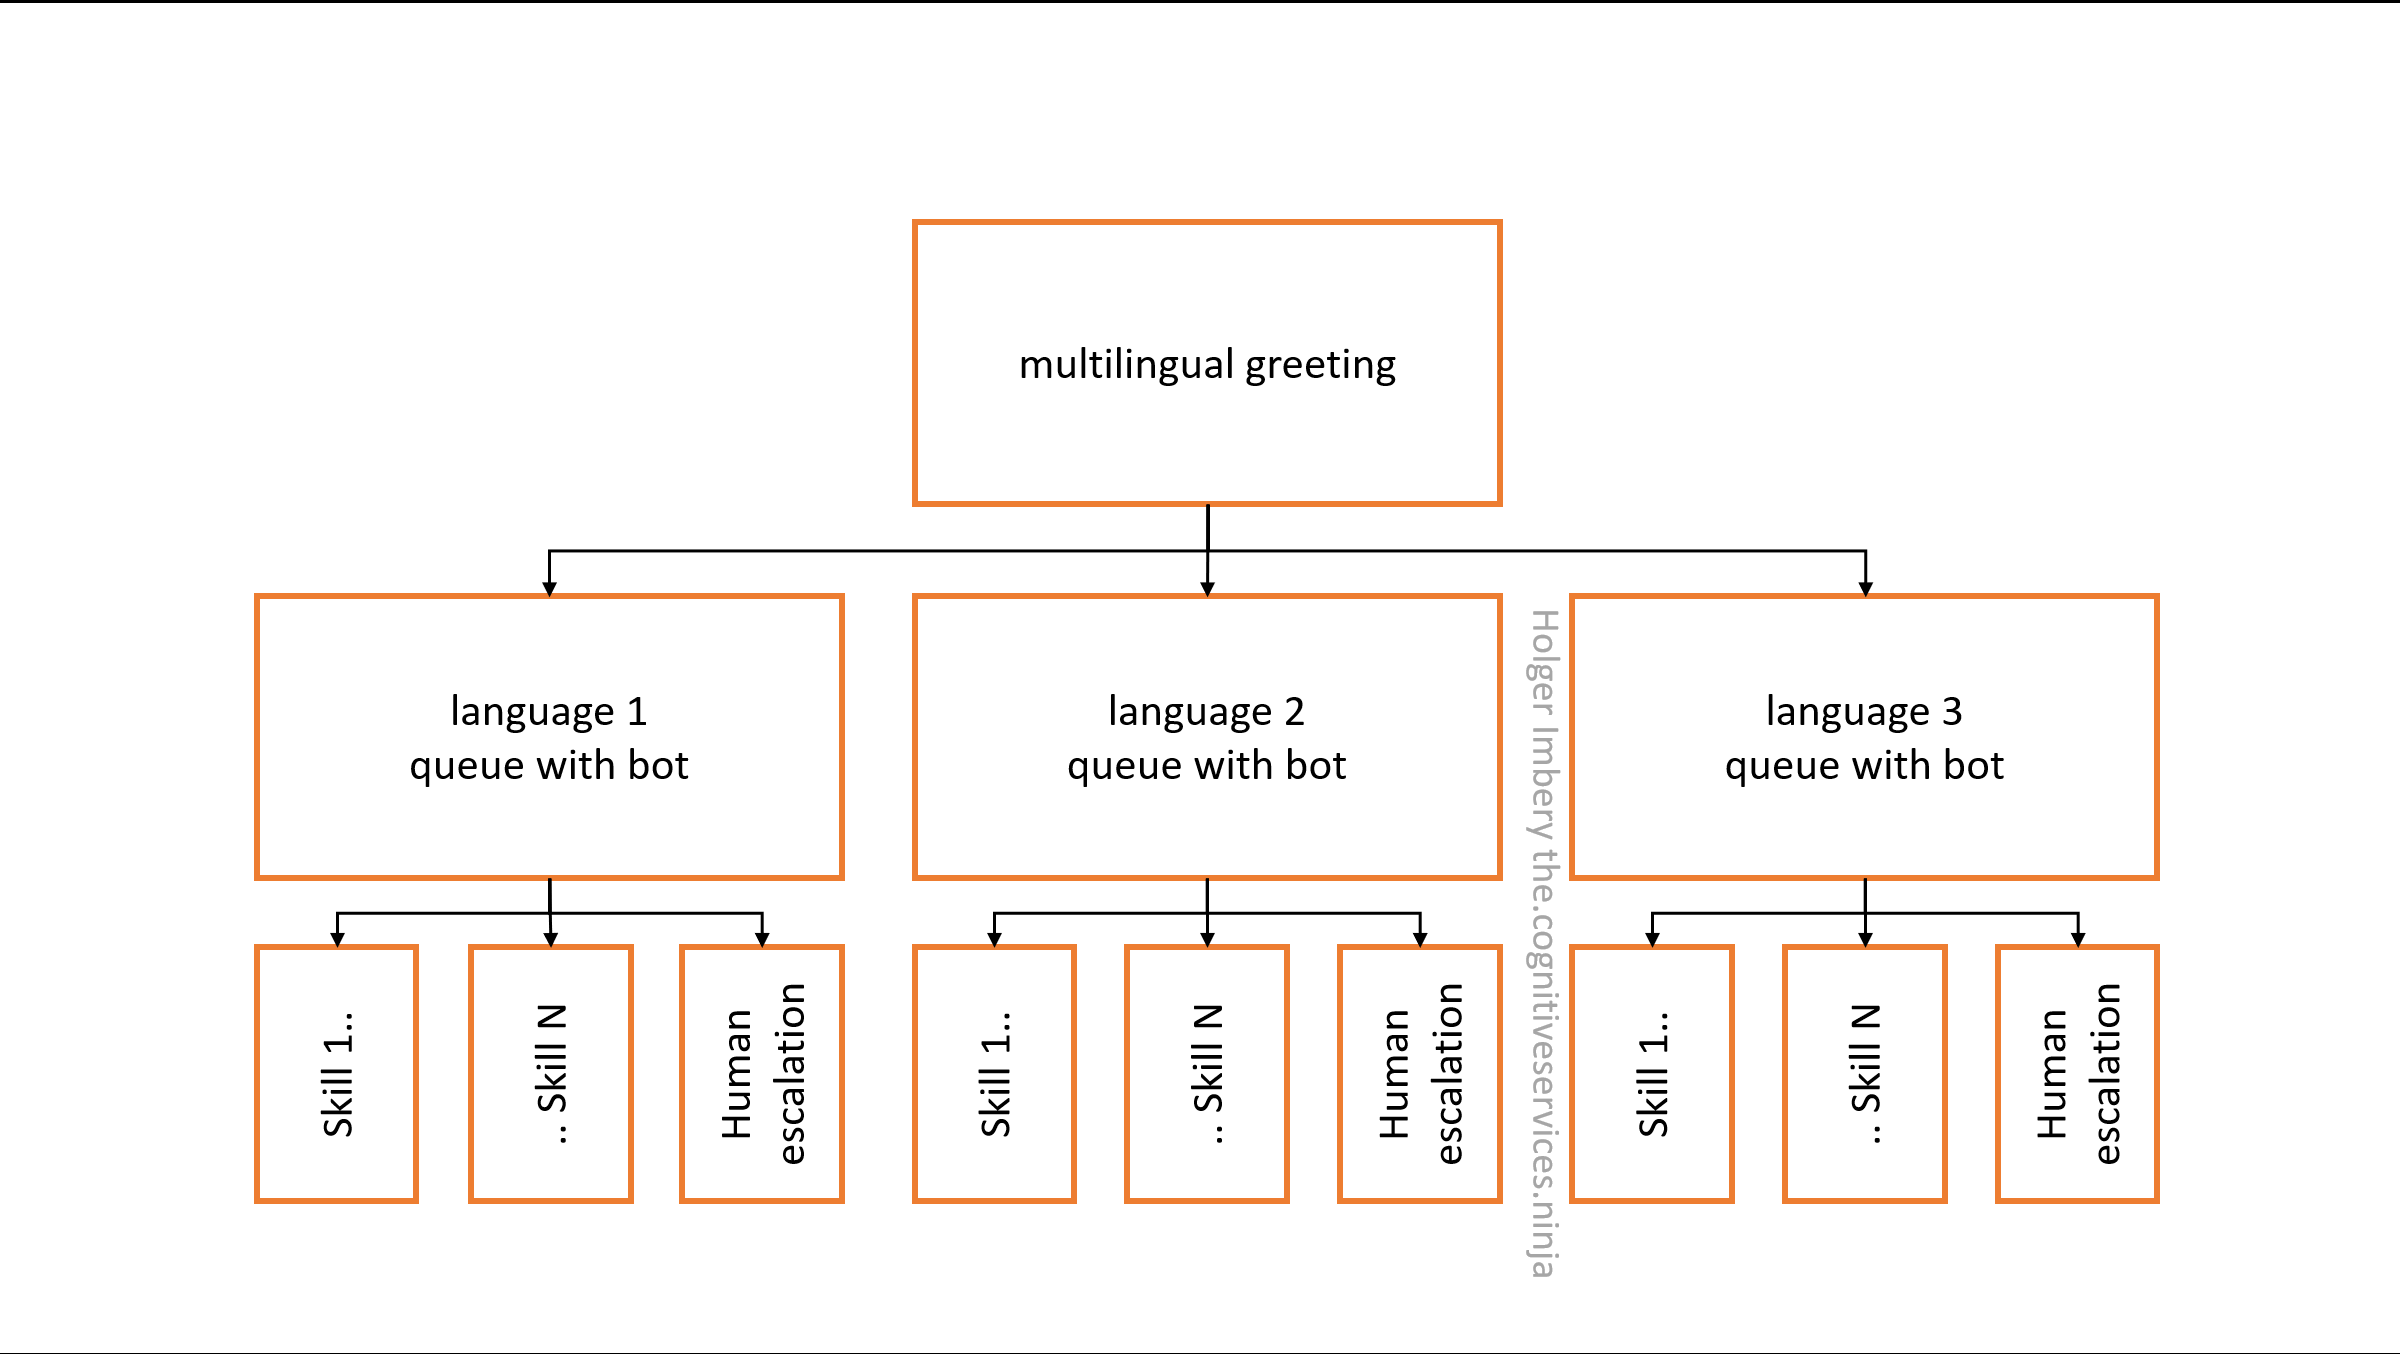
Figure 1: Architecture
Create the first level of the cascade
Create a concierge bot in Power Virtual Agents
Create your “concierge” bot with English (US) language in your Omnichannel-enabled environment.
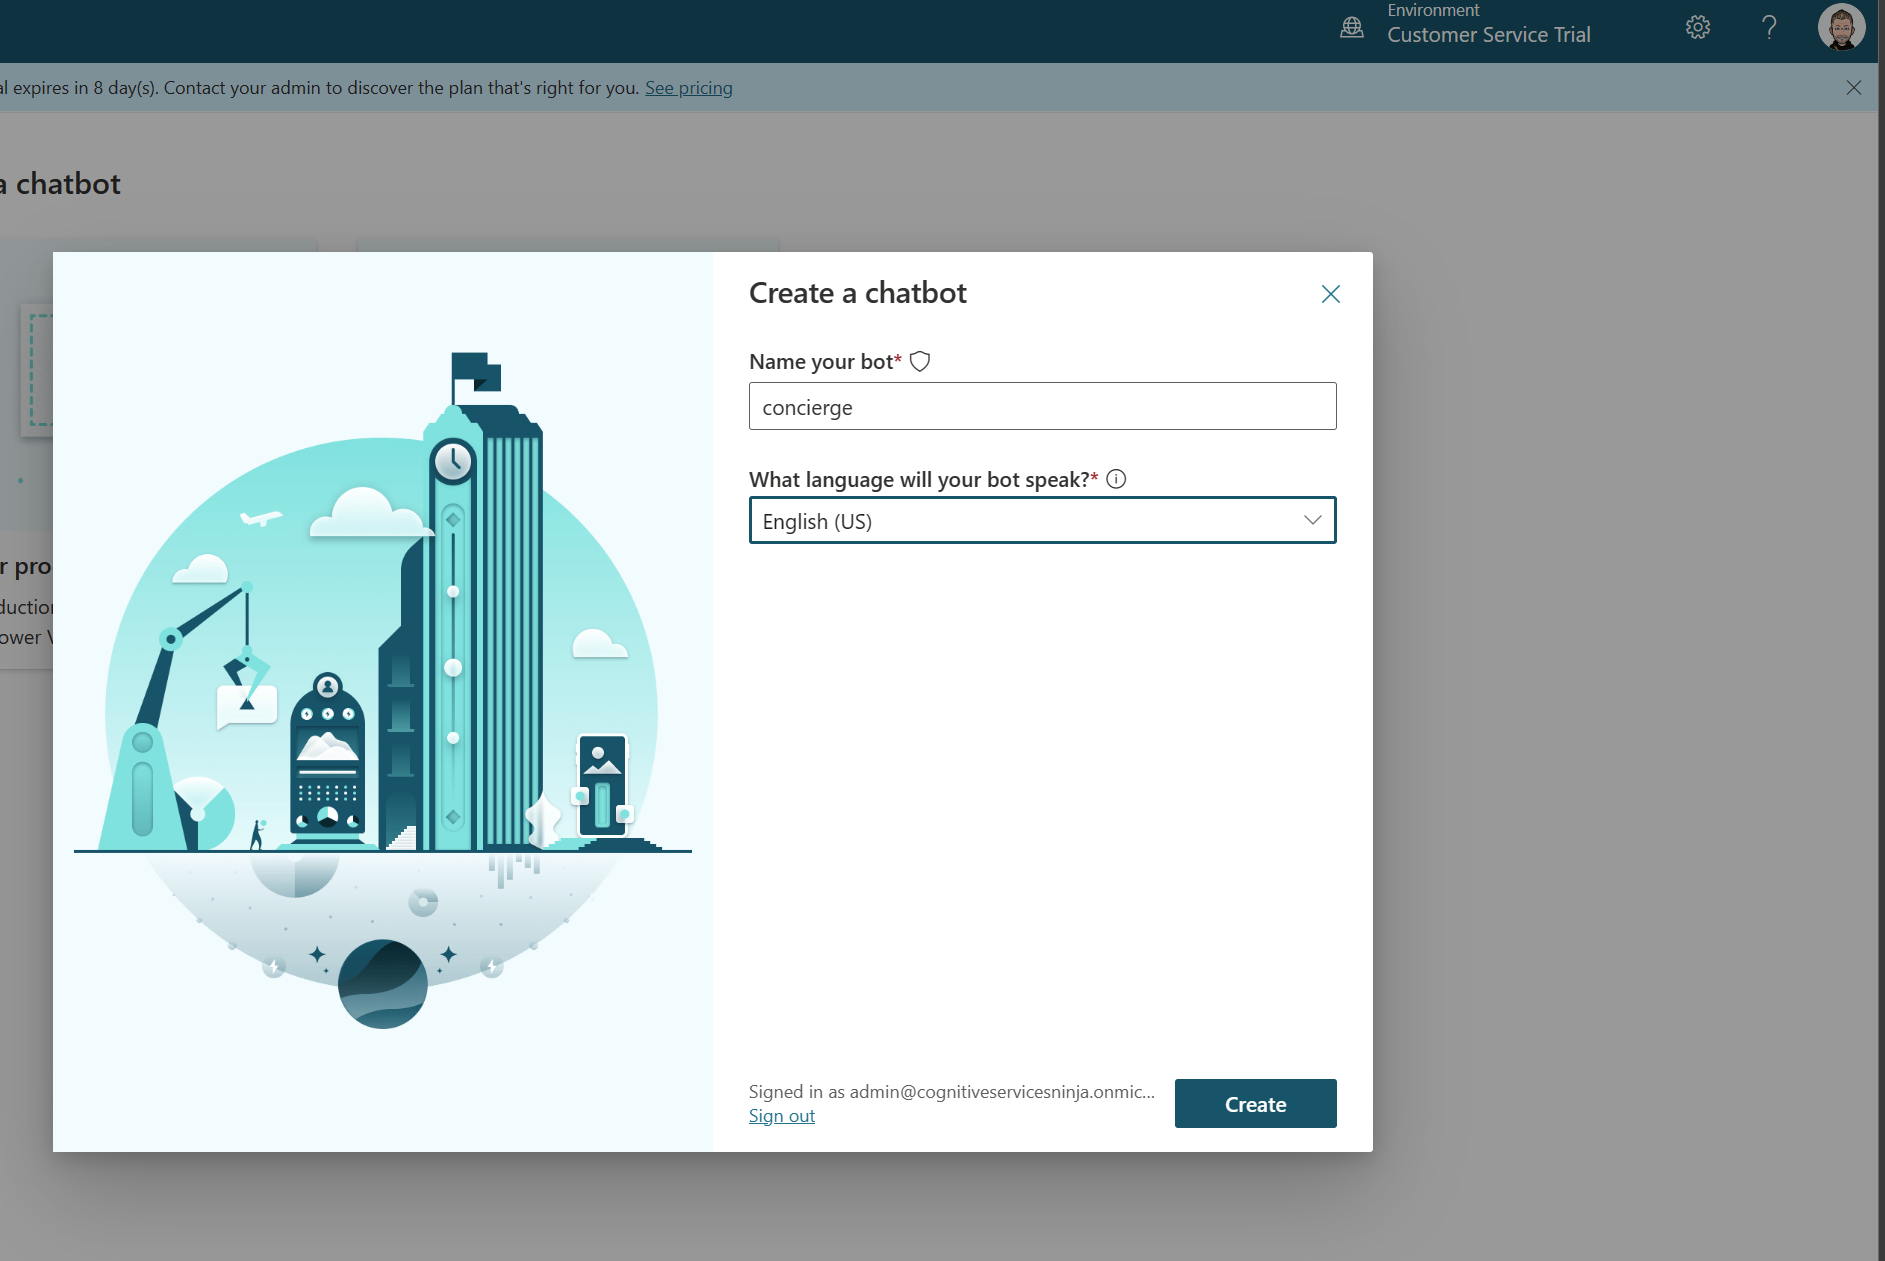
Figure 2: Create a bot
Create a new topic in Bot Framework Composer
Create a new topic with Bot Framework Composer.
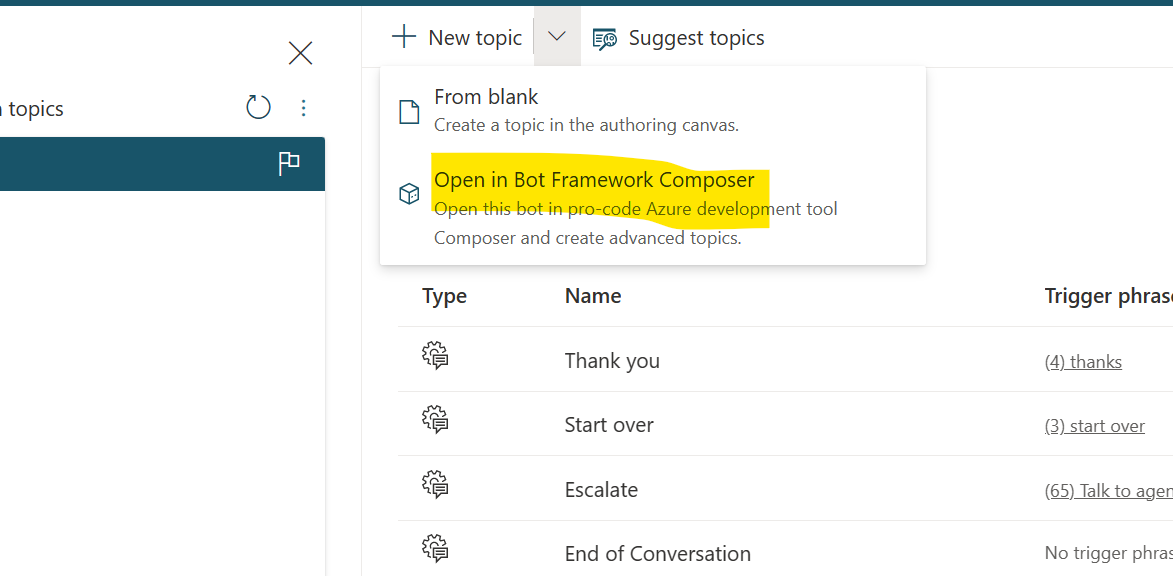
Figure 3: Create a new composer topic
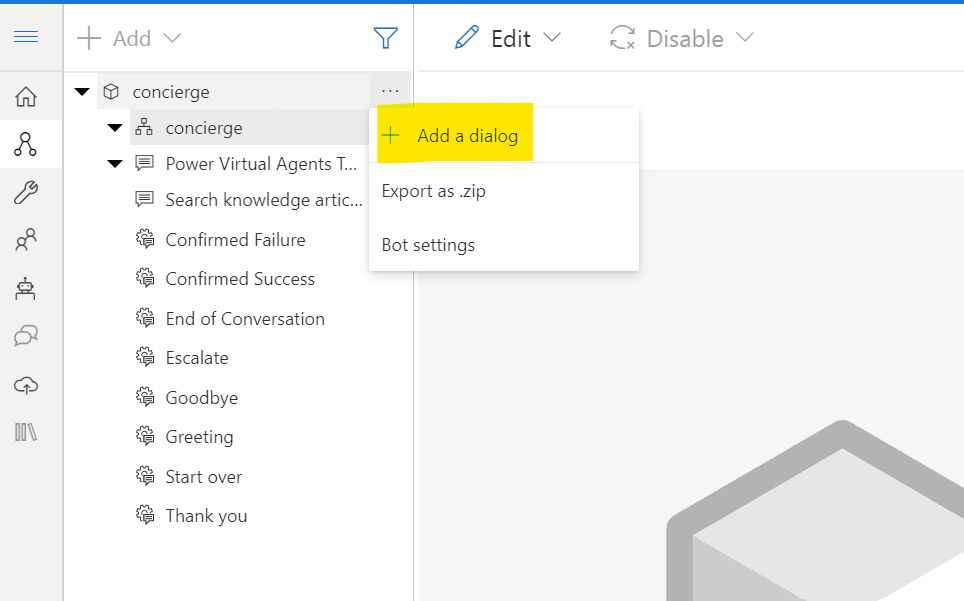
Figure 4: Add dialog
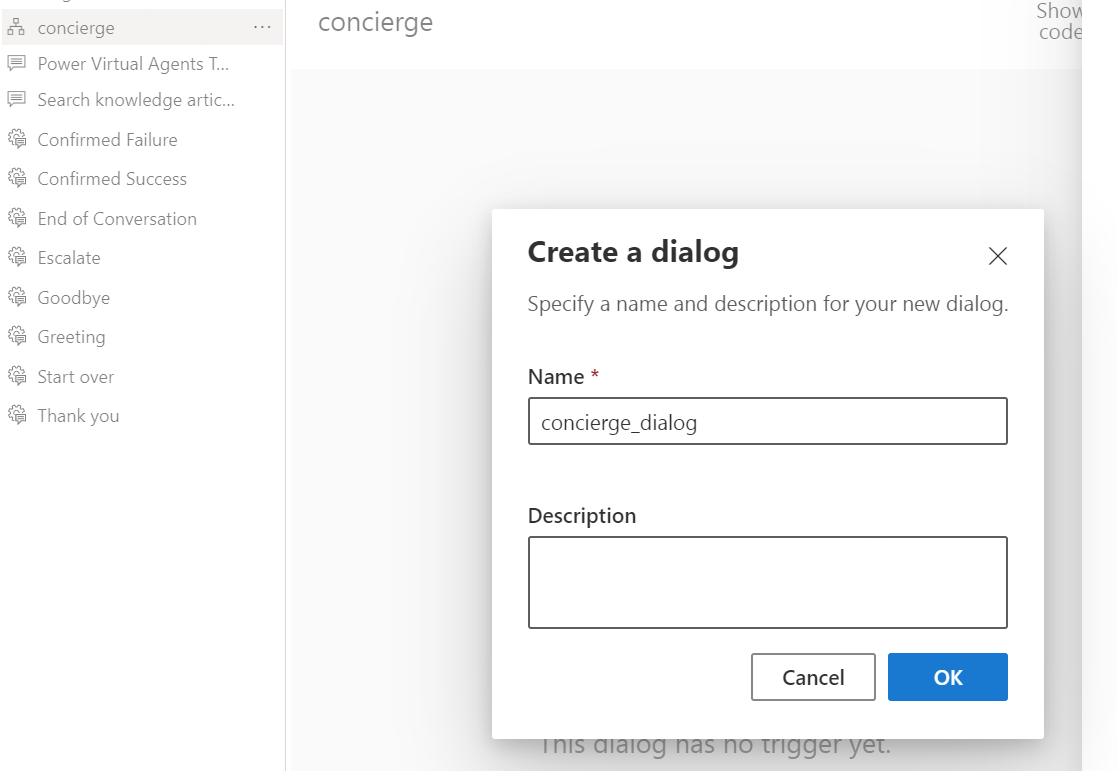
Figure 5: Give the dialog a name
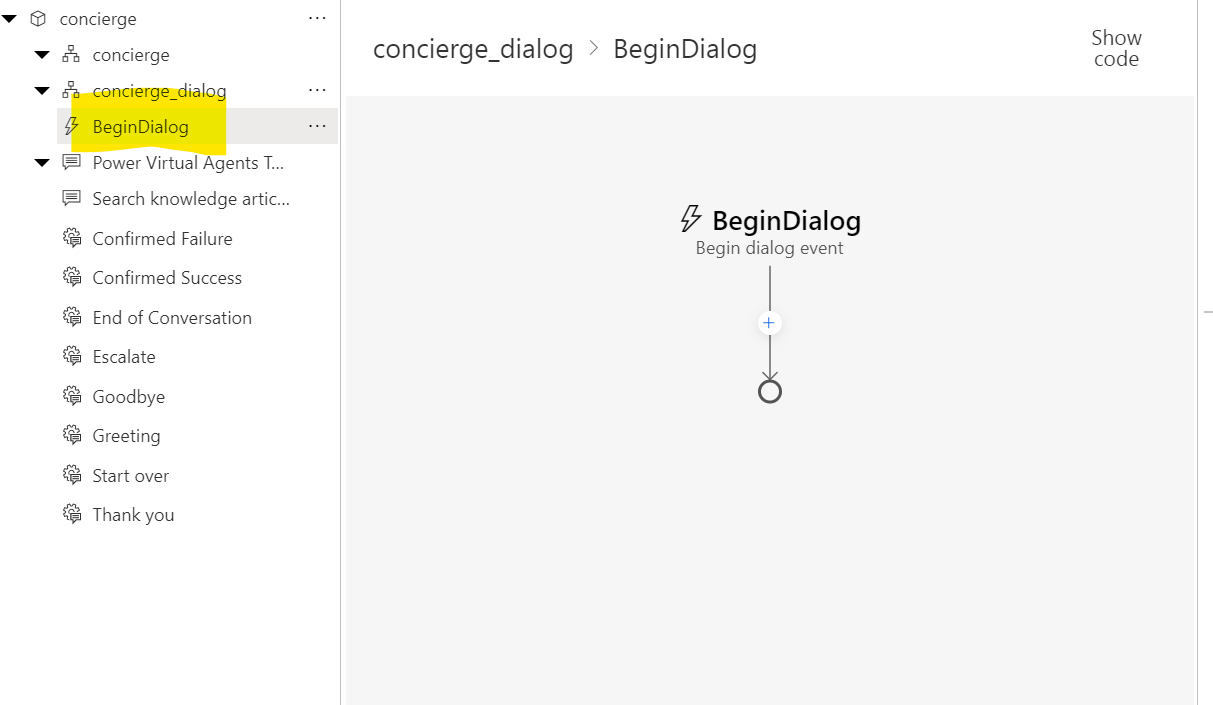
Figure 6: goto BeginDialog
select the Add (+) node, and then select Send a response.
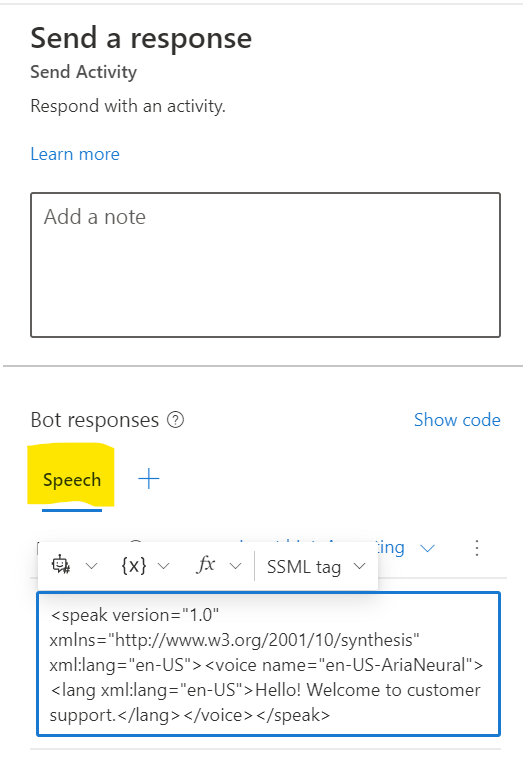
Figure 7: add “Send a response”
<speak version="1.0" xmlns="http://www.w3.org/2001/10/synthesis" xml:lang="en-US"><voice name="en-US-AriaNeural"><lang xml:lang="en-US">Hello! Welcome to customer support.</lang></voice></speak>
The variable ${virtualagent.msdyn_CustomerName} is available for authenticated customers. see Identify customers automatically
select Add (+) node, point to Ask a question, and then choose Multi-choice.
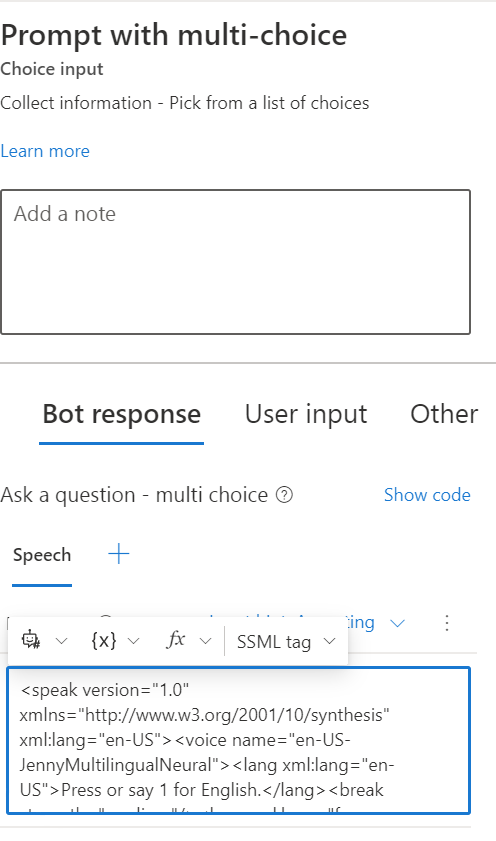
Figure 8: add “Ask a question”
<speak version="1.0" xmlns="http://www.w3.org/2001/10/synthesis" xml:lang="en-US"><voice name="en-US-JennyMultilingualNeural"><lang xml:lang="en-US">Press or say 1 for English.</lang><break strength="medium"/><lang xml:lang="fr-FR">Appuyez ou dites 2 pour le français.</lang><break strength="medium"/><lang xml:lang="de-DE">Sagen oder drücken Sie 3 für Deutsch</lang></voice></speak>
Select the User input box
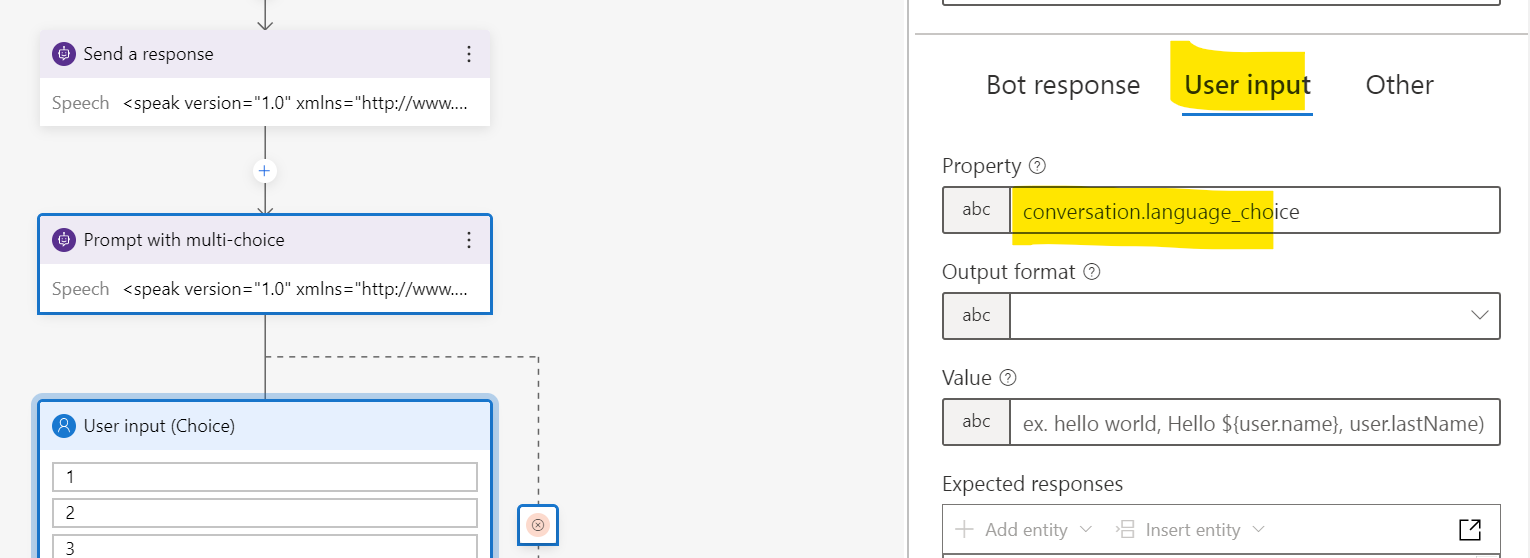
Figure 9: modify user input box
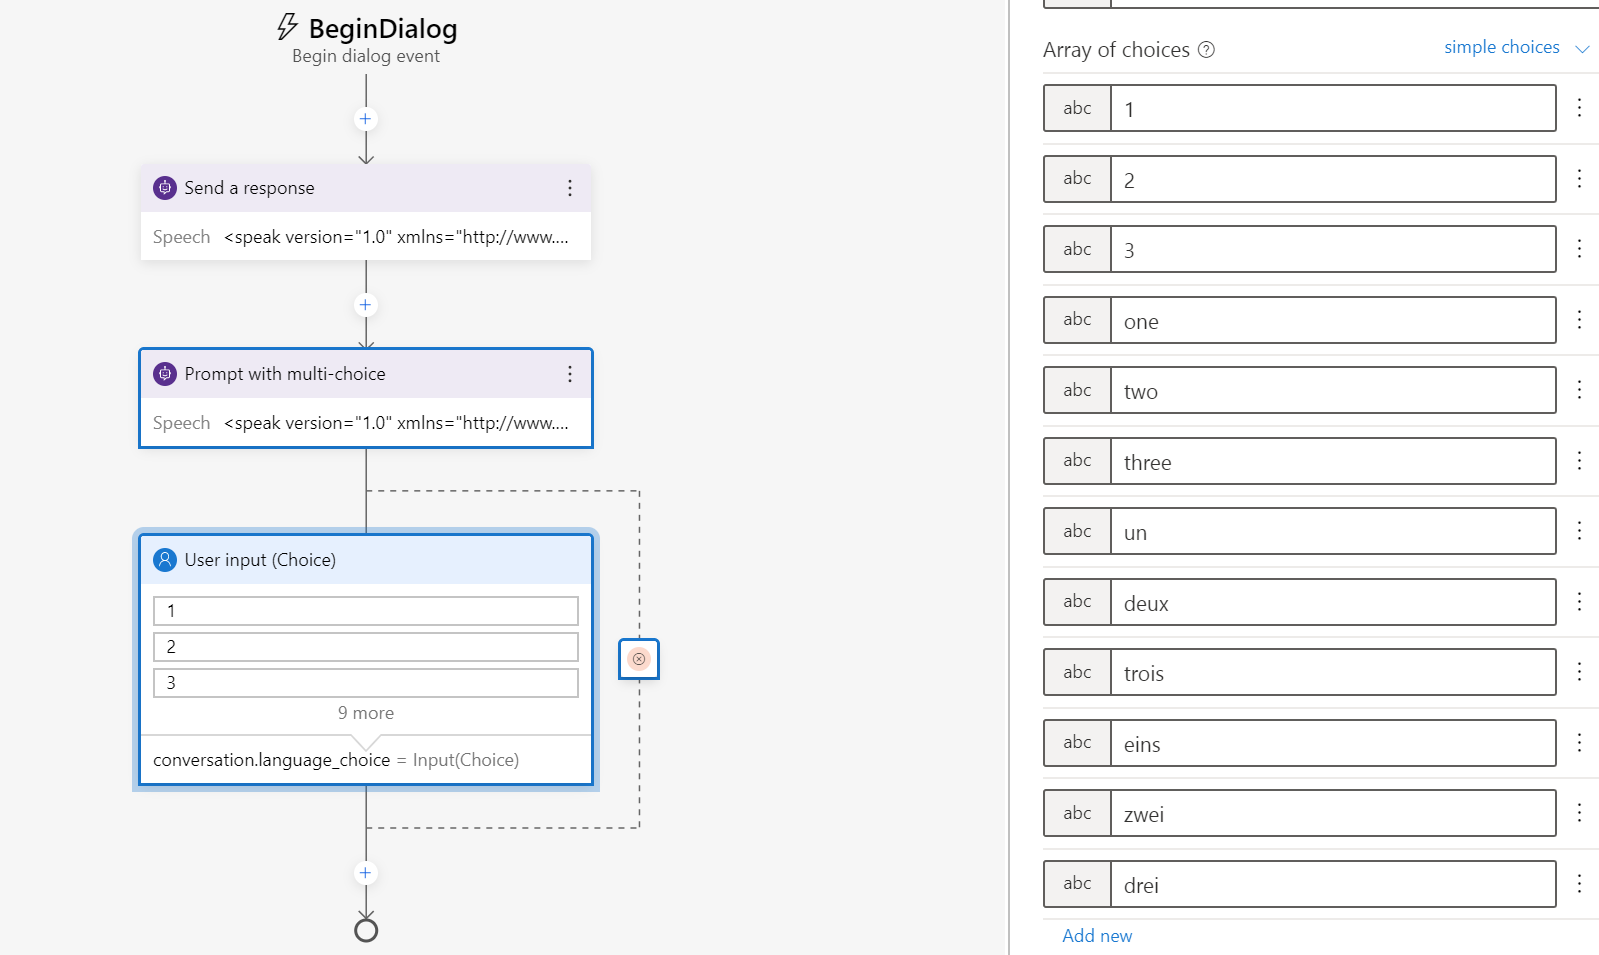
Figure 10: edit array of choices
Property:
conversation.language_choice
Array of choices
1, 2, 3, one, two, three, un, deux, trois, eins, zwei, drei
Select the Add (+) node, select Create a condition, and then select Branch Switch (multiple options)
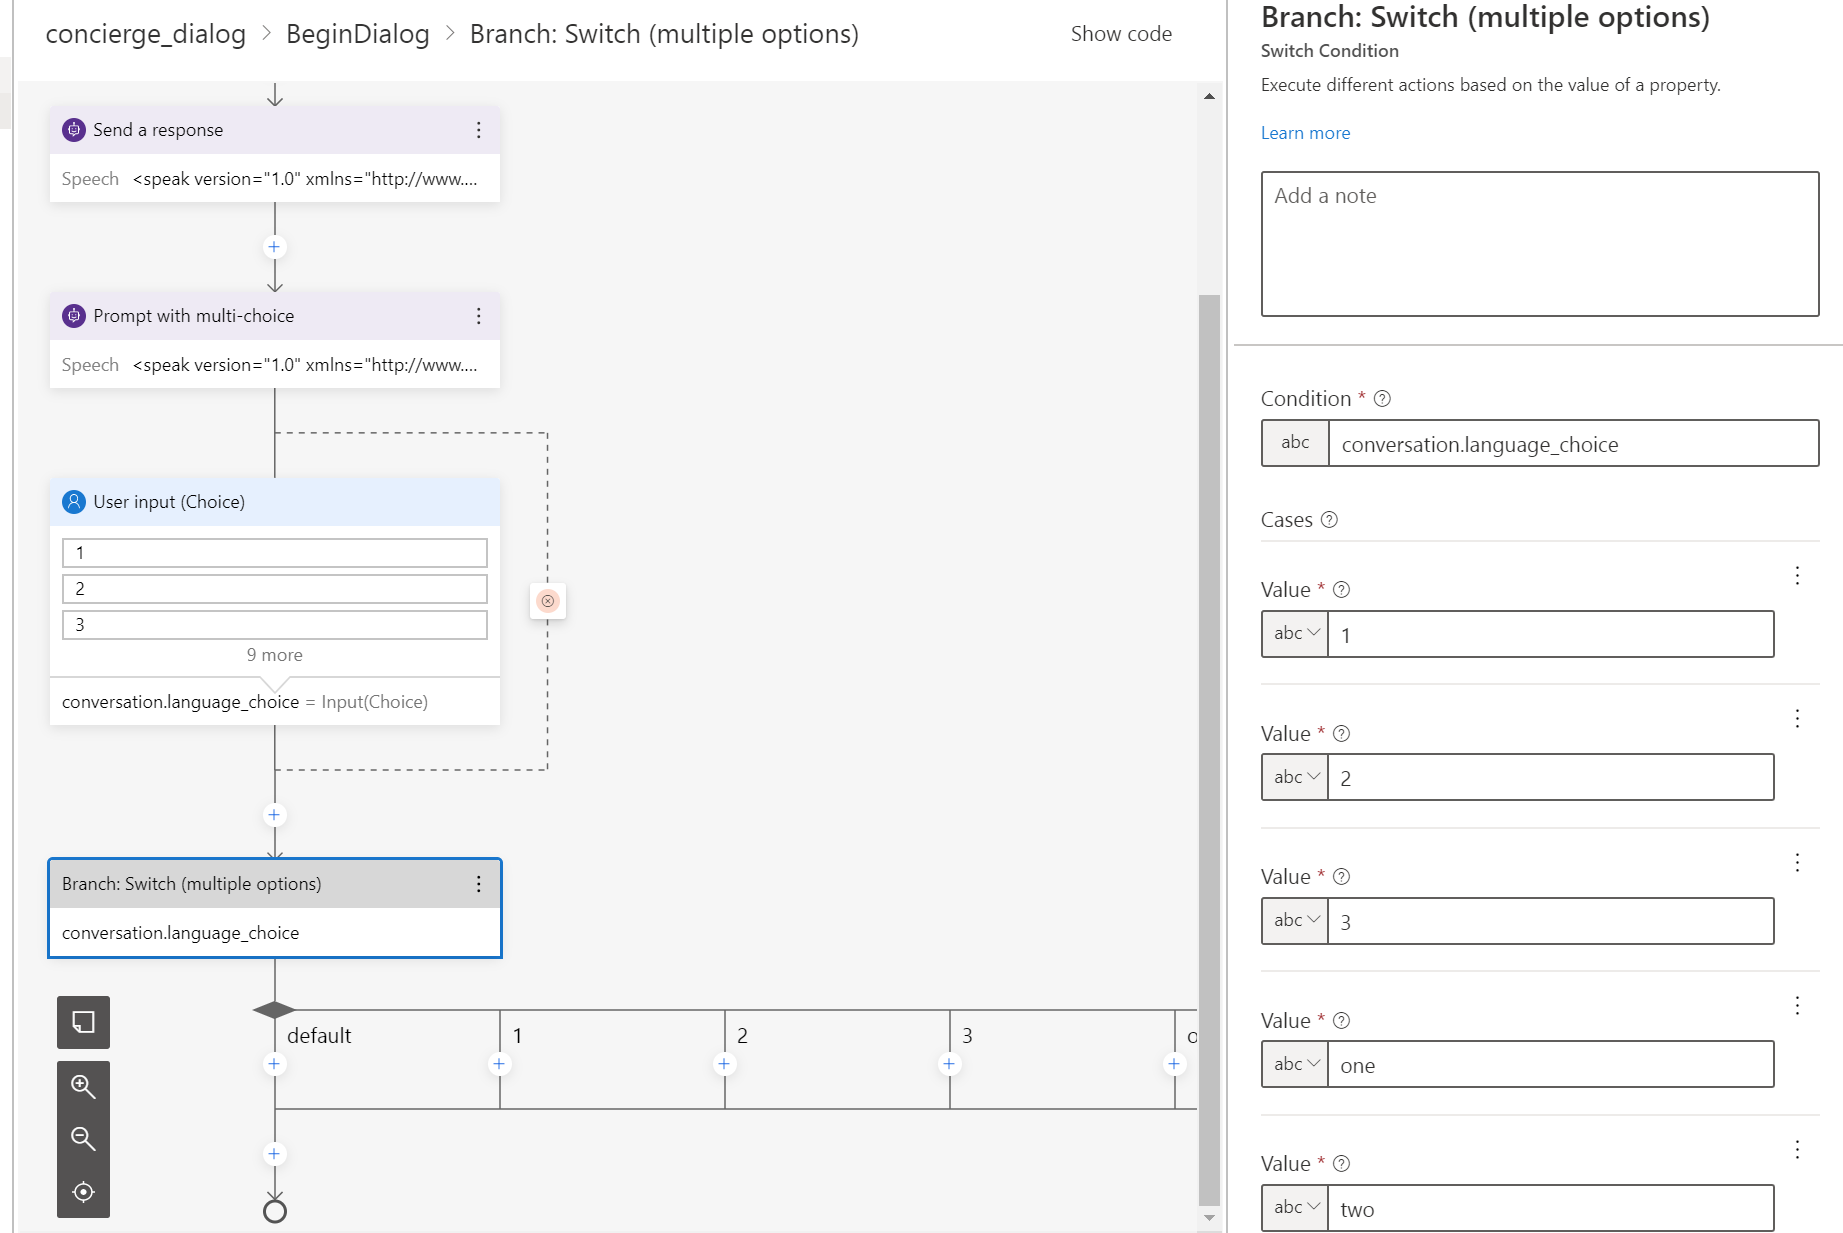
Figure 11: create conditions
Condition:
conversation.language_choice
Value:
Value: 1, 2, 3, One, Two, Three, Un, deux, trois, eins, zwei, drei
Enter here one choice per value.
Select the Add (+) node and then select Manage properties > Set a property
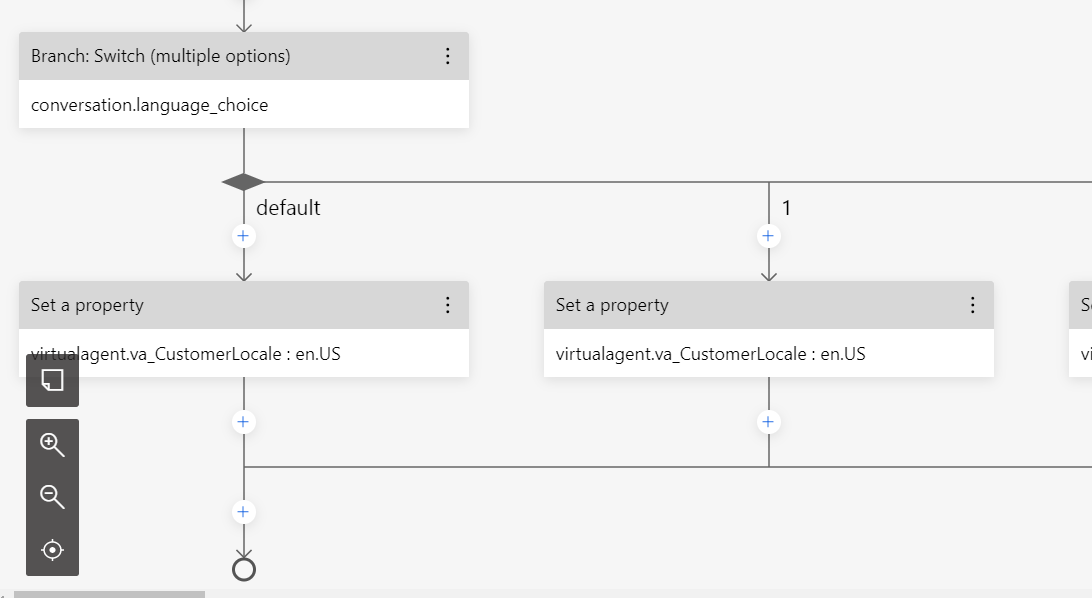
Figure 12: set properties
and enter the following details:
Condition:
virtualagent.va_CustomerLocale
Value:
en-US
Repeat the steps to Set a property for fr-FR, de-DE.
The value for the virtualagent.va_CustomerLocale variable will be updated with the language selected by the caller.
set the va_CustomerLocale context variable with the locale codes for the languages that you want to support. see: Supported locations and locale codes
Select the Add (+) node, and then select Begin a Power Virtual Agent topic.
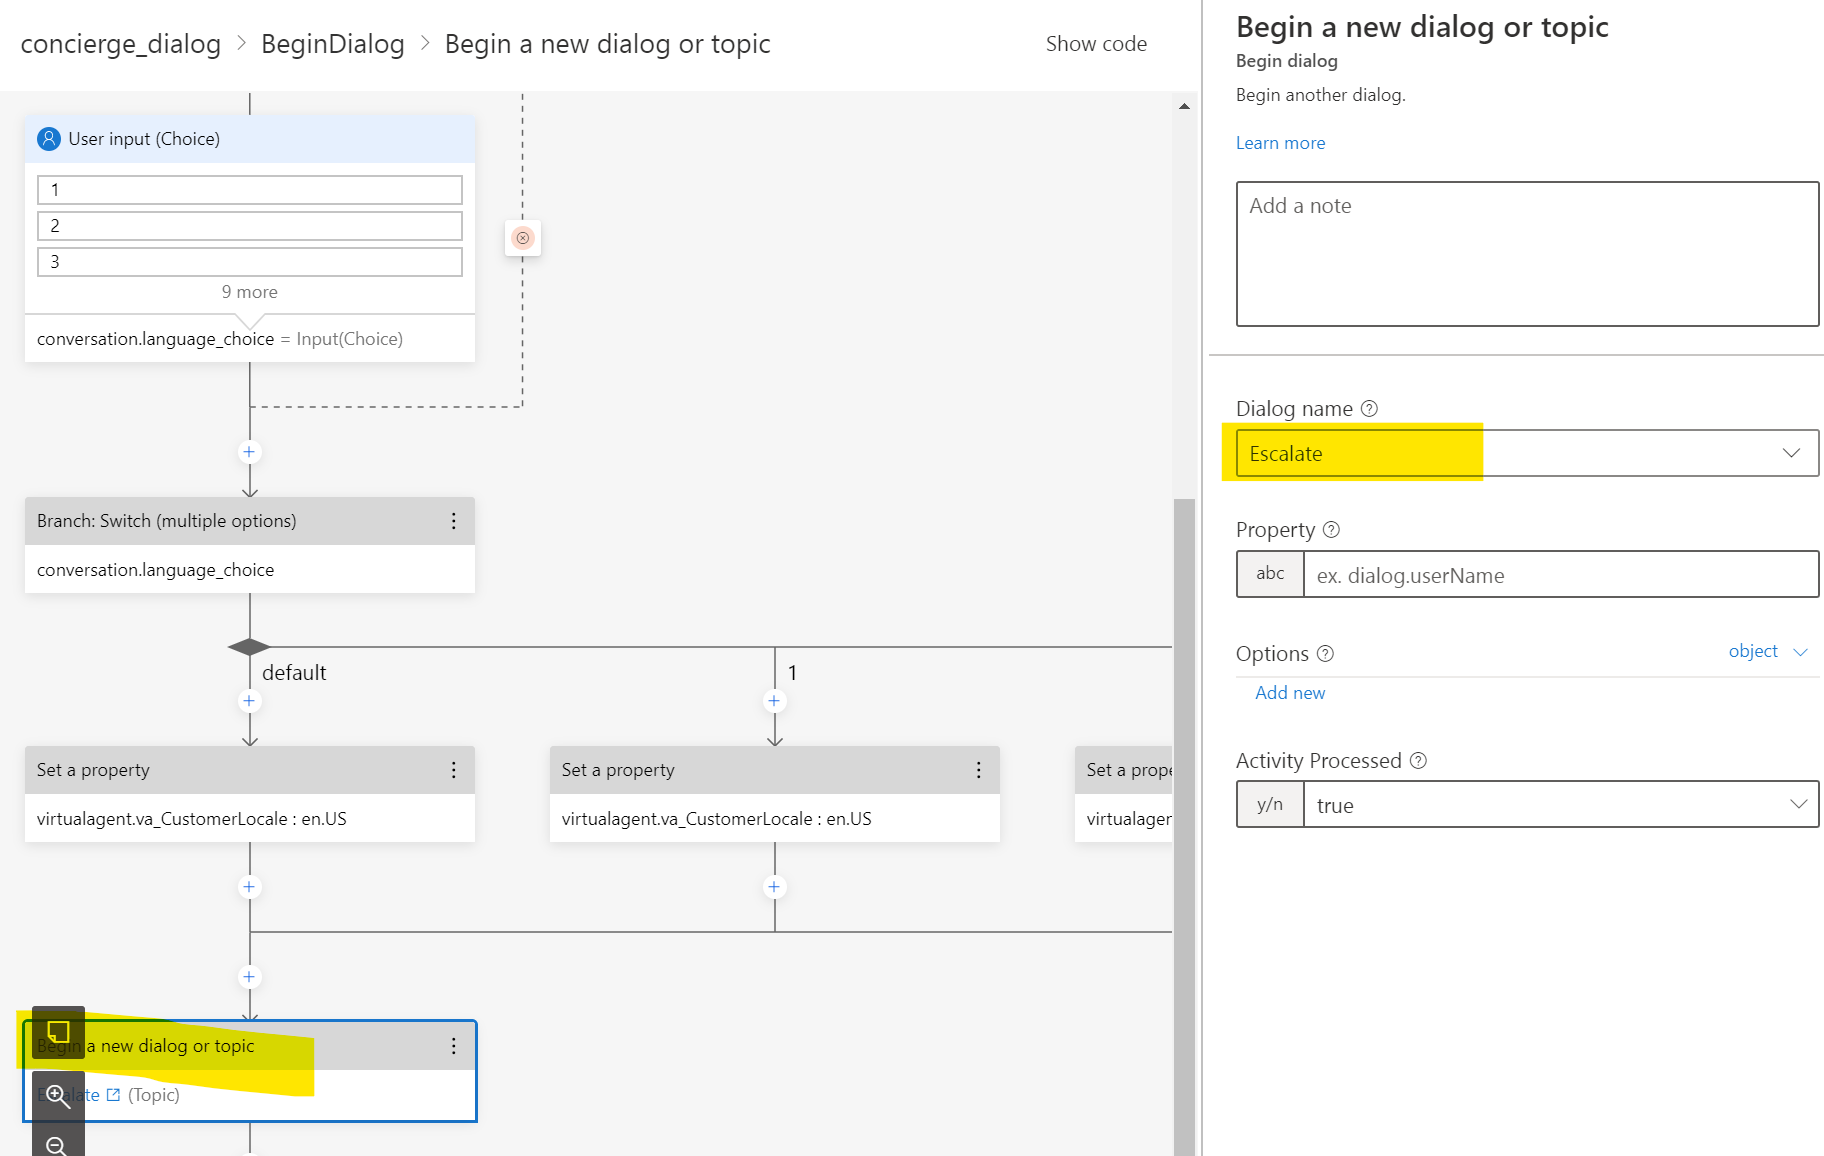
Figure 13: add a “begin a new dialog” node
Select “Escale” in the Dialog name.
Publish the bot in Bot Framework composer, go back to PVA editing canvas, refresh, find the topic and publish in PVA.
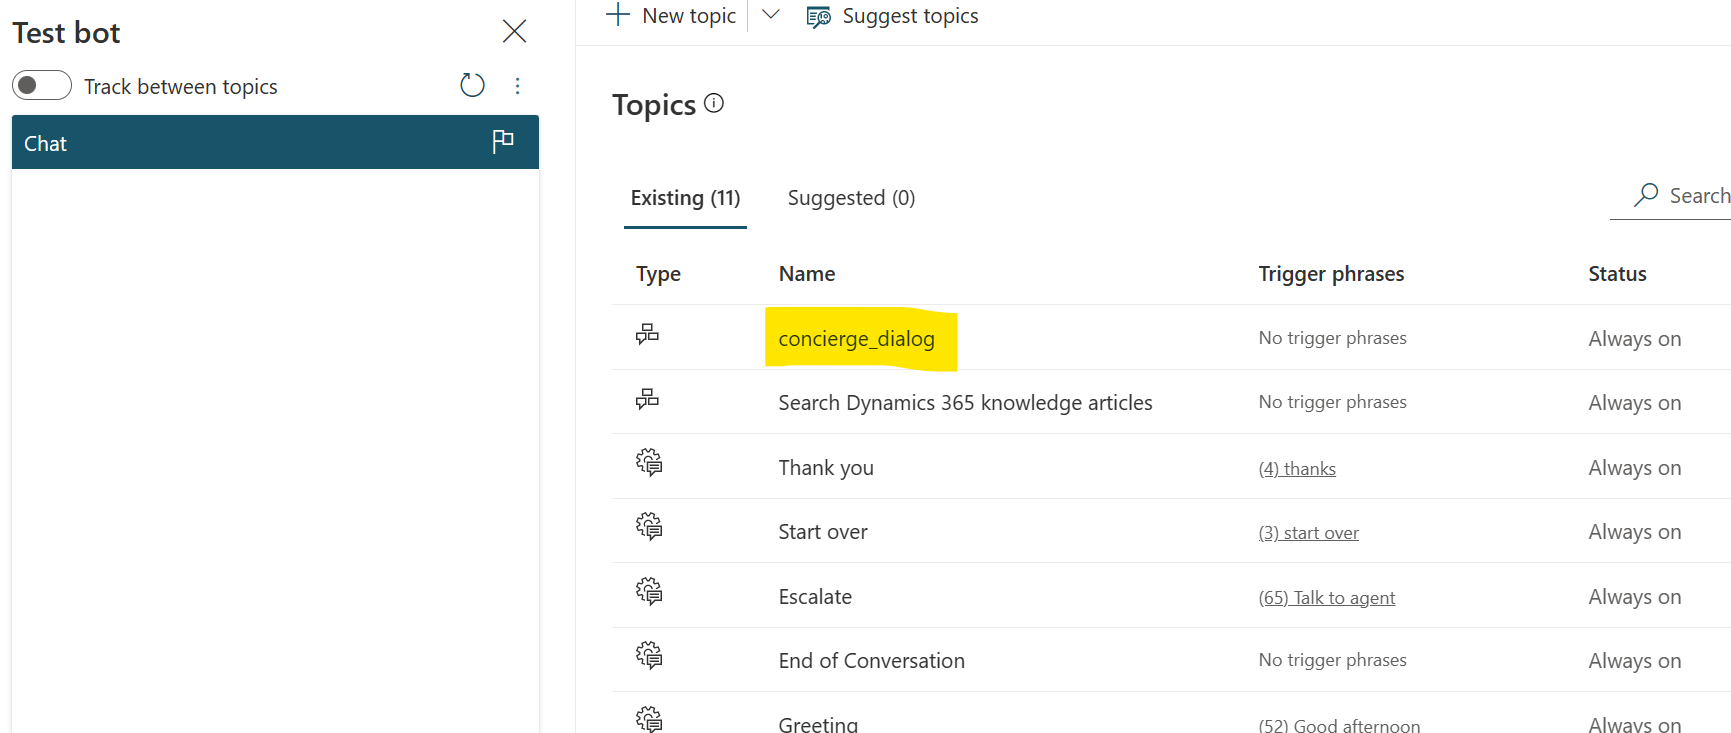
Figure 14: new composer topic in PVA
Configure the greeting topic in Power Virtual Agents
Open the Greeting topic in the authoring canvas and delete everything except the trigger phrases.
Select Add node (+), and then select Redirect to another topic. Choose the topic you created above.
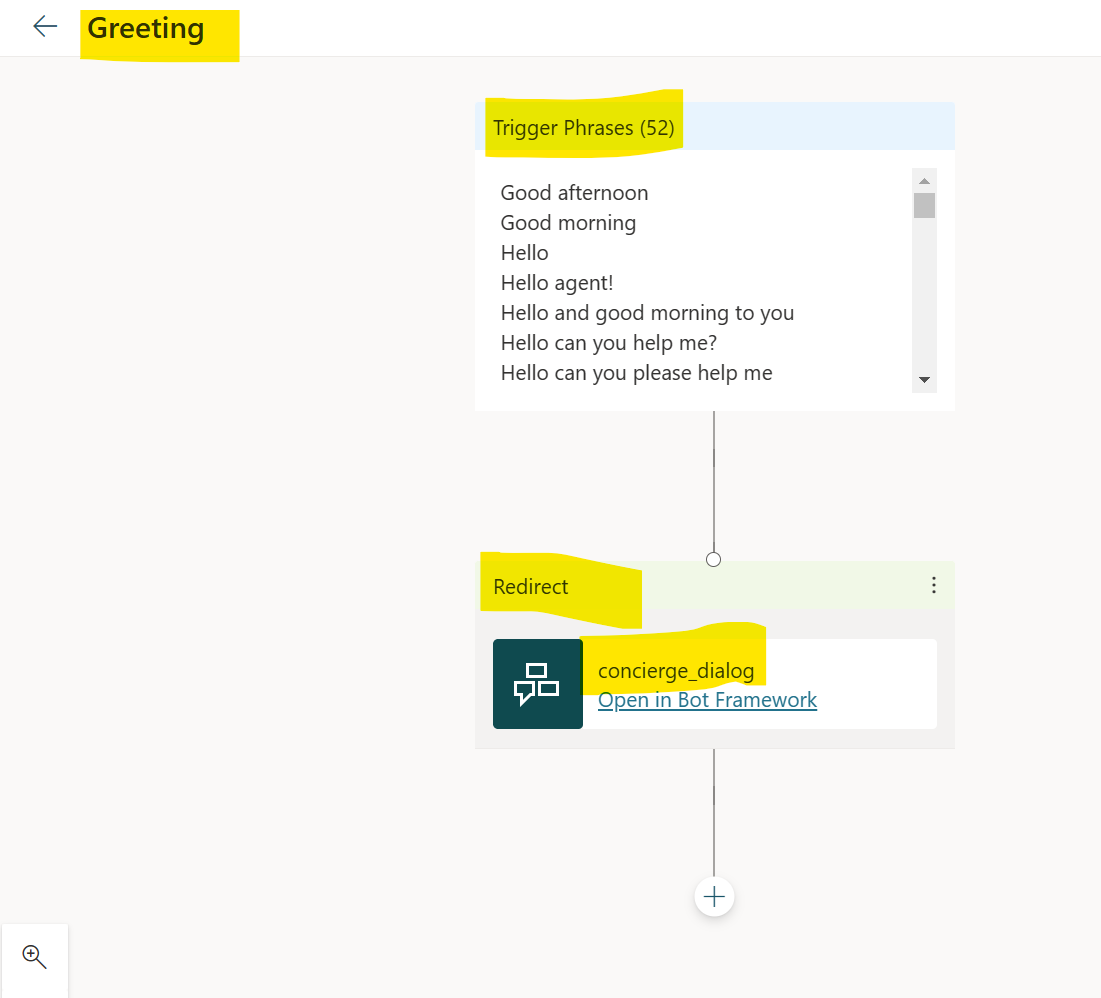
Figure 15: modify greeting
Configure the transfer to the next queue by using the escalate topic
open the Escalate topic in the authoring canvas, and delete all the default messages except the trigger phrases.
Select Add node (+), select End the conversation, and then select transfer to agent.
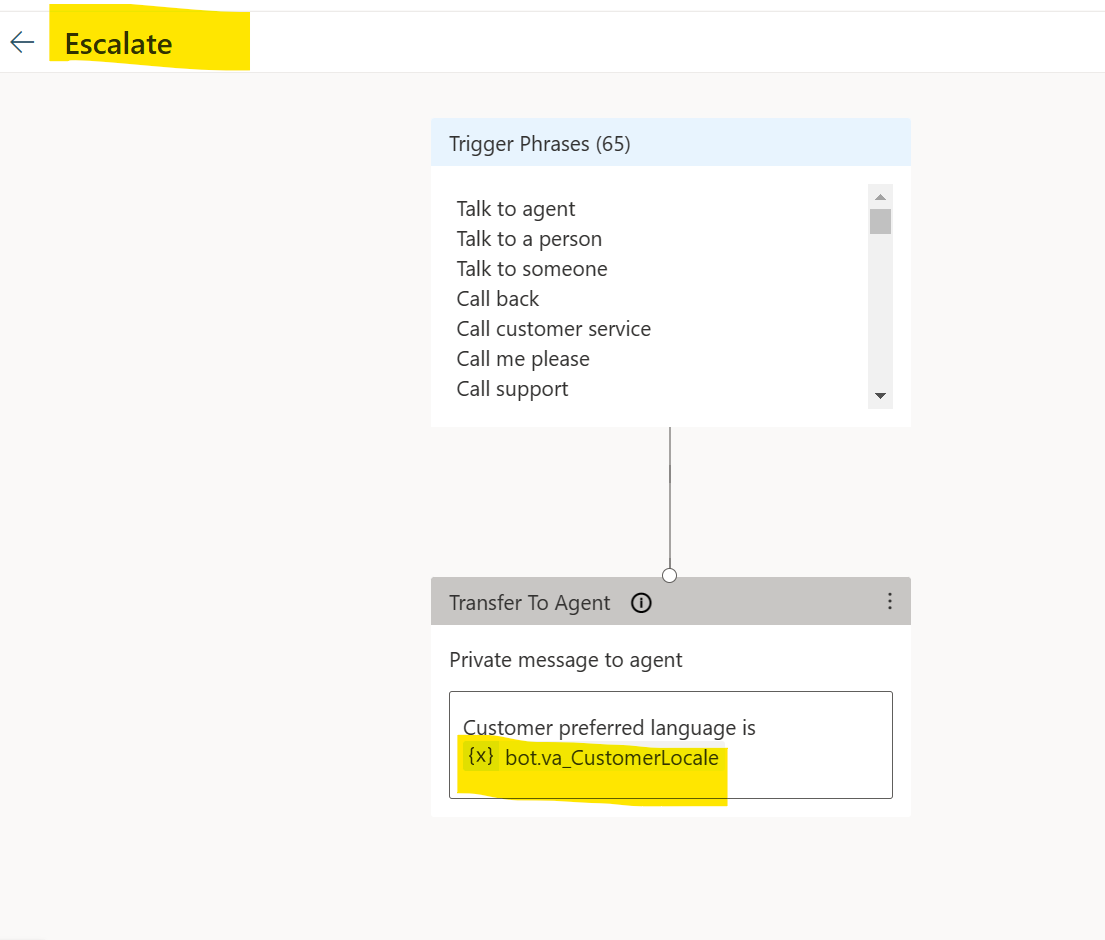
Figure 16: escalate topic for handover
Save and publish.
Check your application registration on AAD Portal and remember the Application ID.
(See prerequisite)

Figure 17: Application Registration
Go to Settings, Agent transfer, select Omnichannel, enable it and configure the transfer with the Application ID.
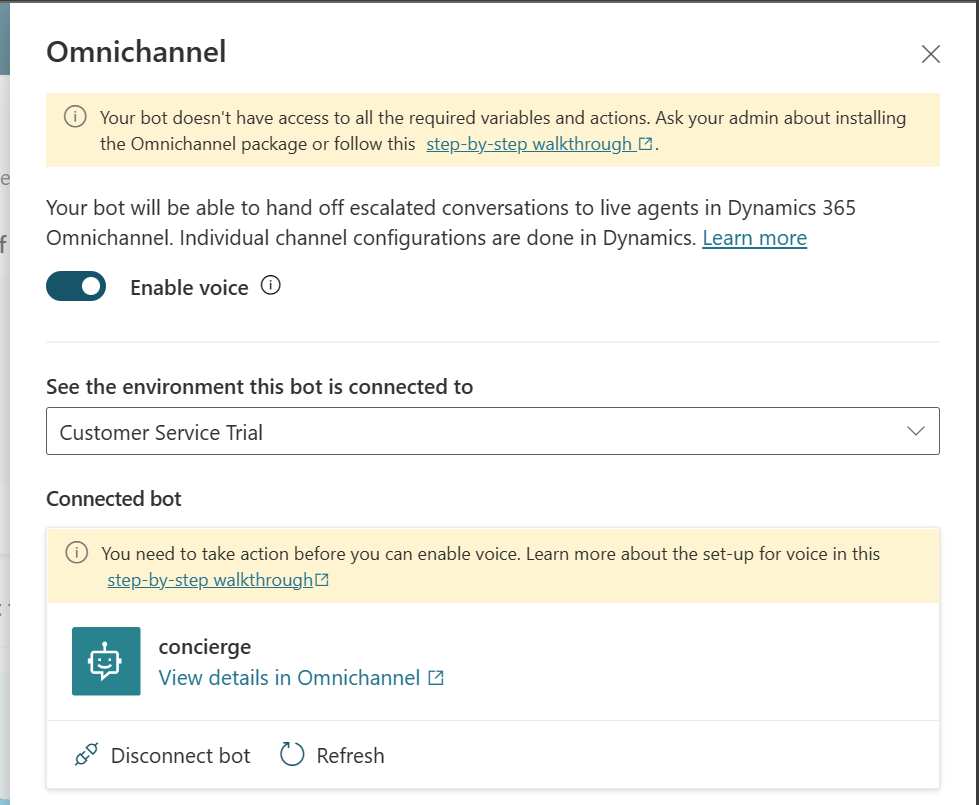
Figure 18: configure omnichannel
Configure workstreams and queues
In Dynamics 365 Customer Service Admin Center configure a voice workstream, a voice queue, and their routing rules.
Please find my Articles:
-
Dynamics 365 Customer Service with Power Virtual Agents - Part 1 (automation with text chat)
-
Dynamics 365 Customer Service with Power Virtual Agents - Part 2 (automation with voice/voice bots)
as a reference.
Use the configured bot as the bot in the workstream settings as an escalation target for the bot; we need to configure three additional queues - one each for English, French, and German and add the required agents, or if you want to use a bot, add the bot.
Configure a voice workstream with English as the primary language and French and German as additional languages.
In the route to queues rule set of the workstream, use Conversation.CustomerLanguage as the criteria to route the incoming call to different language queues based on the option selected by the customer.
Test implementation
As a customer, call the number registered with the voice workstream with a phone with a registered CallerID and one without. Hear the greeting and make your choice.
next steps
You can use this mechanism to cascade; please feel free to add additional bots and escalations to give your customer a choice of targets to consult. Do not forget it is better to have a bot doing the job immediately instead of waiting for an agent.


Start the conversation