Table of Contents
Archived post - content may be outdate
Motivation
With Azure OpenAI services enhanced by your data, robust language models and Azure Cognitive Search work together to index your data and provide responses following your organization’s policies. This ensures the protection of your intellectual property, as your data and access to it remain securely in your control.
By integrating this into Visual Studio Code, you can obtain instant answers to your questions without switching between multiple applications, allowing you to focus on your authoring & coding environment.
Background
Using Azure OpenAI with your data allows you to operate compatible chat models, such as GPT-3.5-Turbo and GPT-4, without the need to train or fine-tune them. Executing these models on your data enhances your ability to engage in conversations and analyze your information with increased precision and speed. As a result, you can uncover valuable insights that aid in making informed business decisions, recognizing trends and patterns, and optimizing your operations. A primary advantage of Azure OpenAI with your data is its capacity to customize the content of conversational AI.
Since the model can access and reference particular sources to bolster its responses, answers rely not solely on its pre-existing knowledge but also on the most recent information in the specified data source. This foundational data assists the model in preventing the generation of responses based on outdated or inaccurate information.
Note:
To get started, you need to already have been approved for Azure OpenAI access and have an Azure OpenAI Service resource with either the gpt-35-turbo or the gpt-4 models deployed.
To gain insights on Azure OpenAI service, please refer to another article of mine.
Create a Custom Model within your Subscription
-
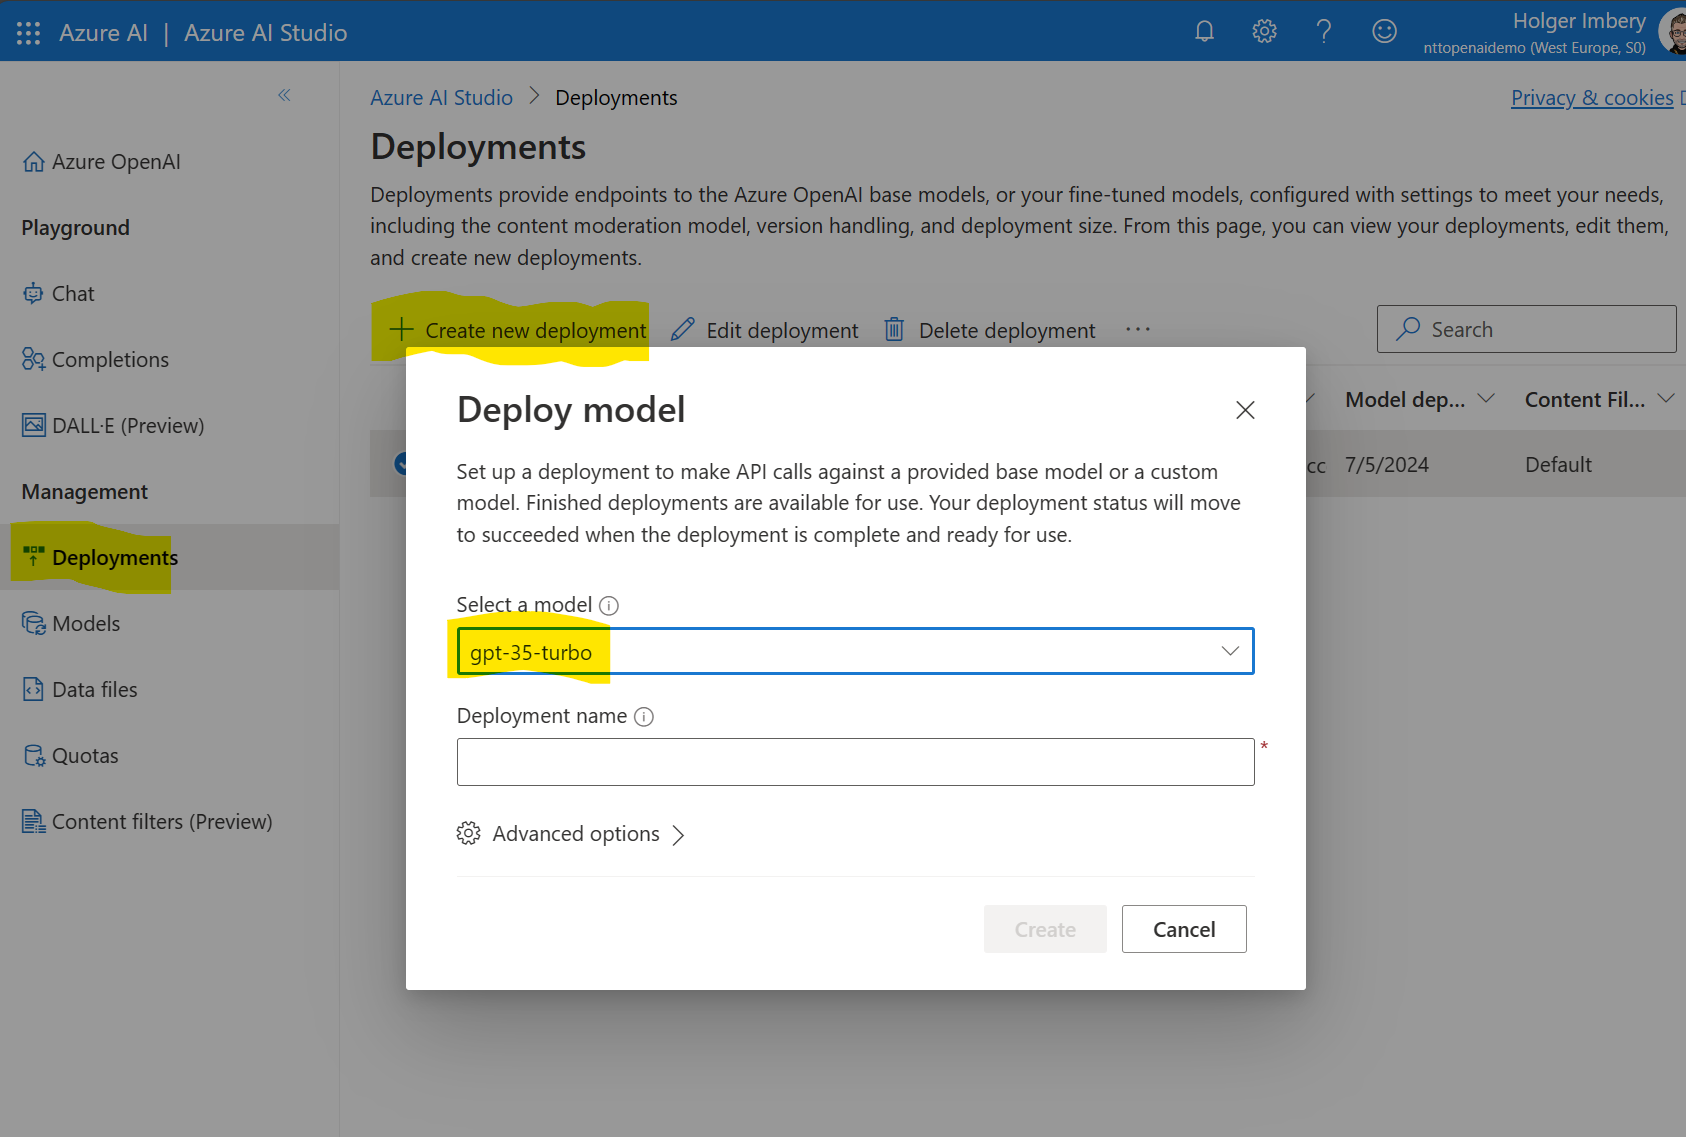
Go to “https://oai.azure.com” and create a new model deployment if you have done this before
-
Select “gpt-35-turbo” and give your deployment a name.
-
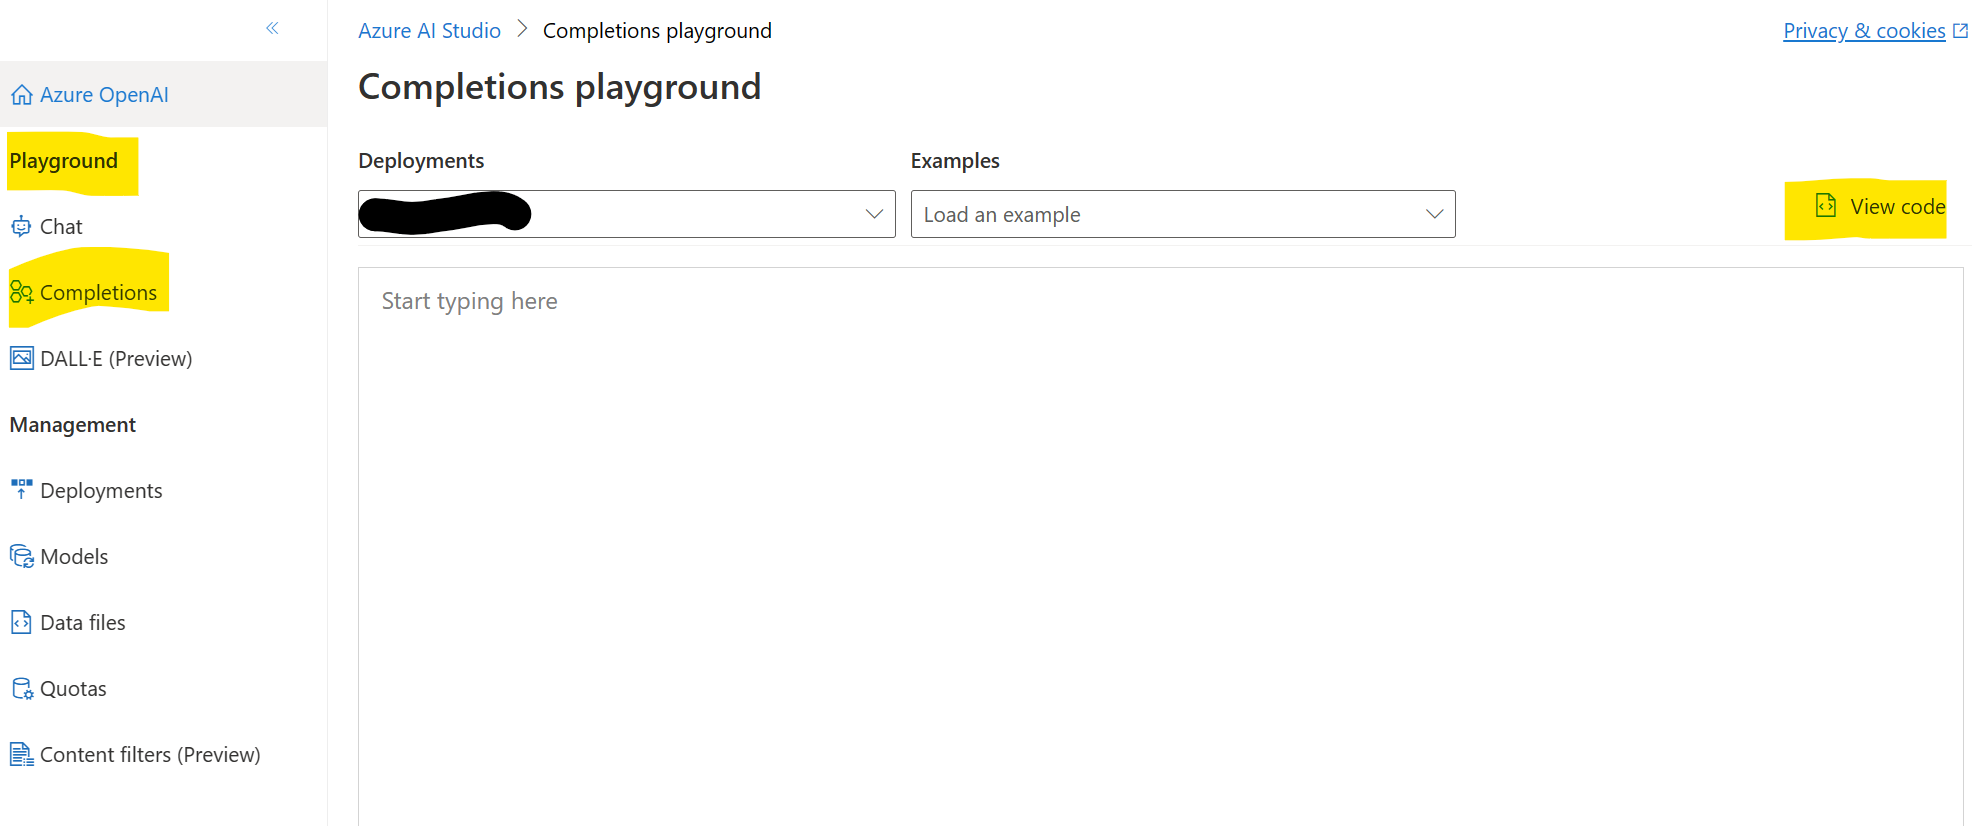
Go to playground/completions/view code,
-
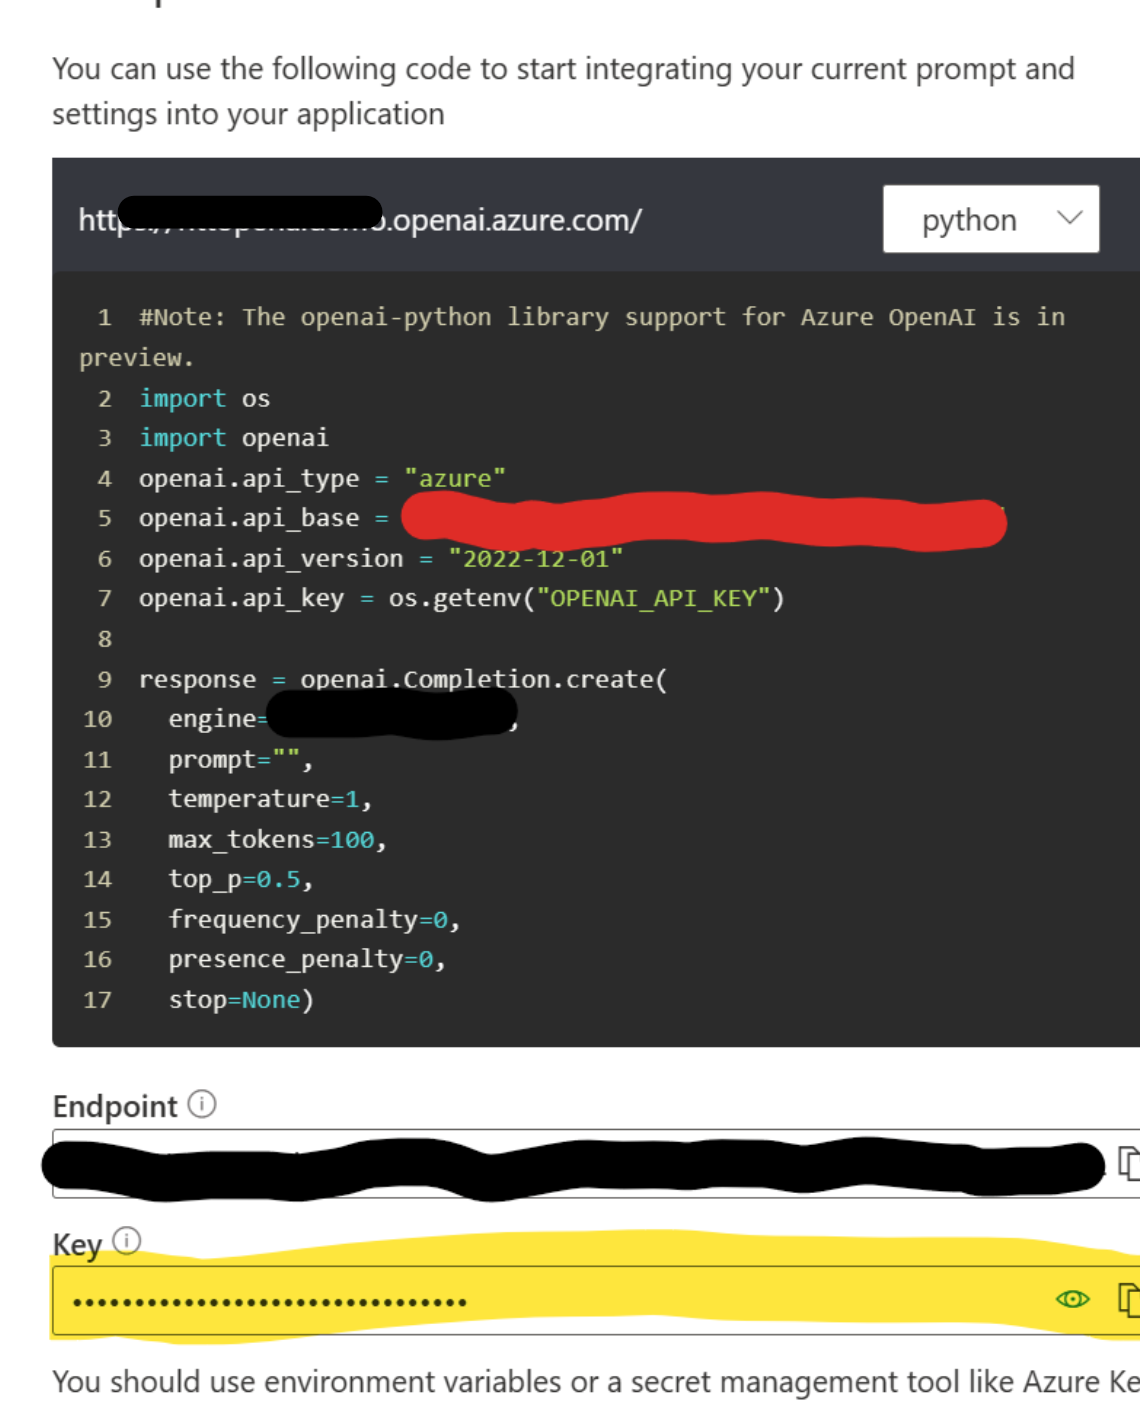
obtain the endpoint address (red) & API key (yellow), and store it in a safe place.
Add an extension to your Visual Studio Code.
In this article, I will use an exceptional extension created by Andrew Butson called vscode-openai.
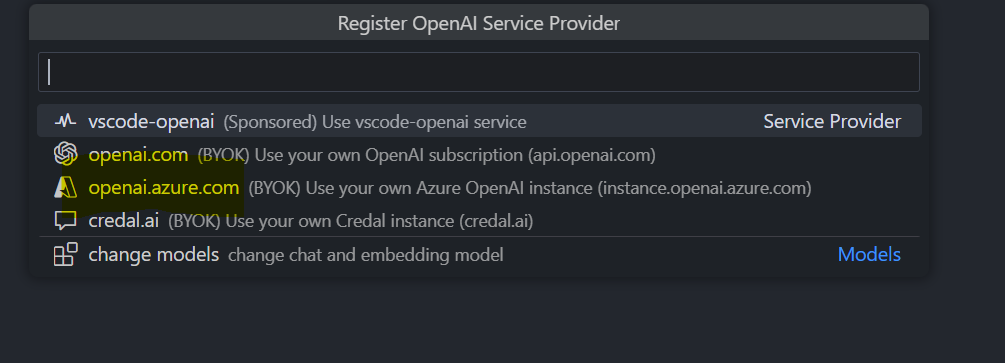
To install the extension, search for “AndrewButson.vscode-openai” in your Visual Studio Code and activate the Azure OpenAI Services as a resource provider. You can do this through the command palette by pressing “Ctrl+Shift+P” and entering “vscode-openai: Register openai service”.
-
select openai.azure.com
-
and configure the resource provider with the details you stored before.
Usage
Once you have completed the installation process, you can converse with your model, even in different personas, directly with your editor. Additionally, you can include supplementary sources to enhance your experience. Moreover, you can easily access coding and committing assistance, all at your fingertips.
Go to the author’s GitHub repository for the complete documentation and additional inspiration possible.
To gain further insight into the model, please look at another article of mine.
Example 1: Working with Text

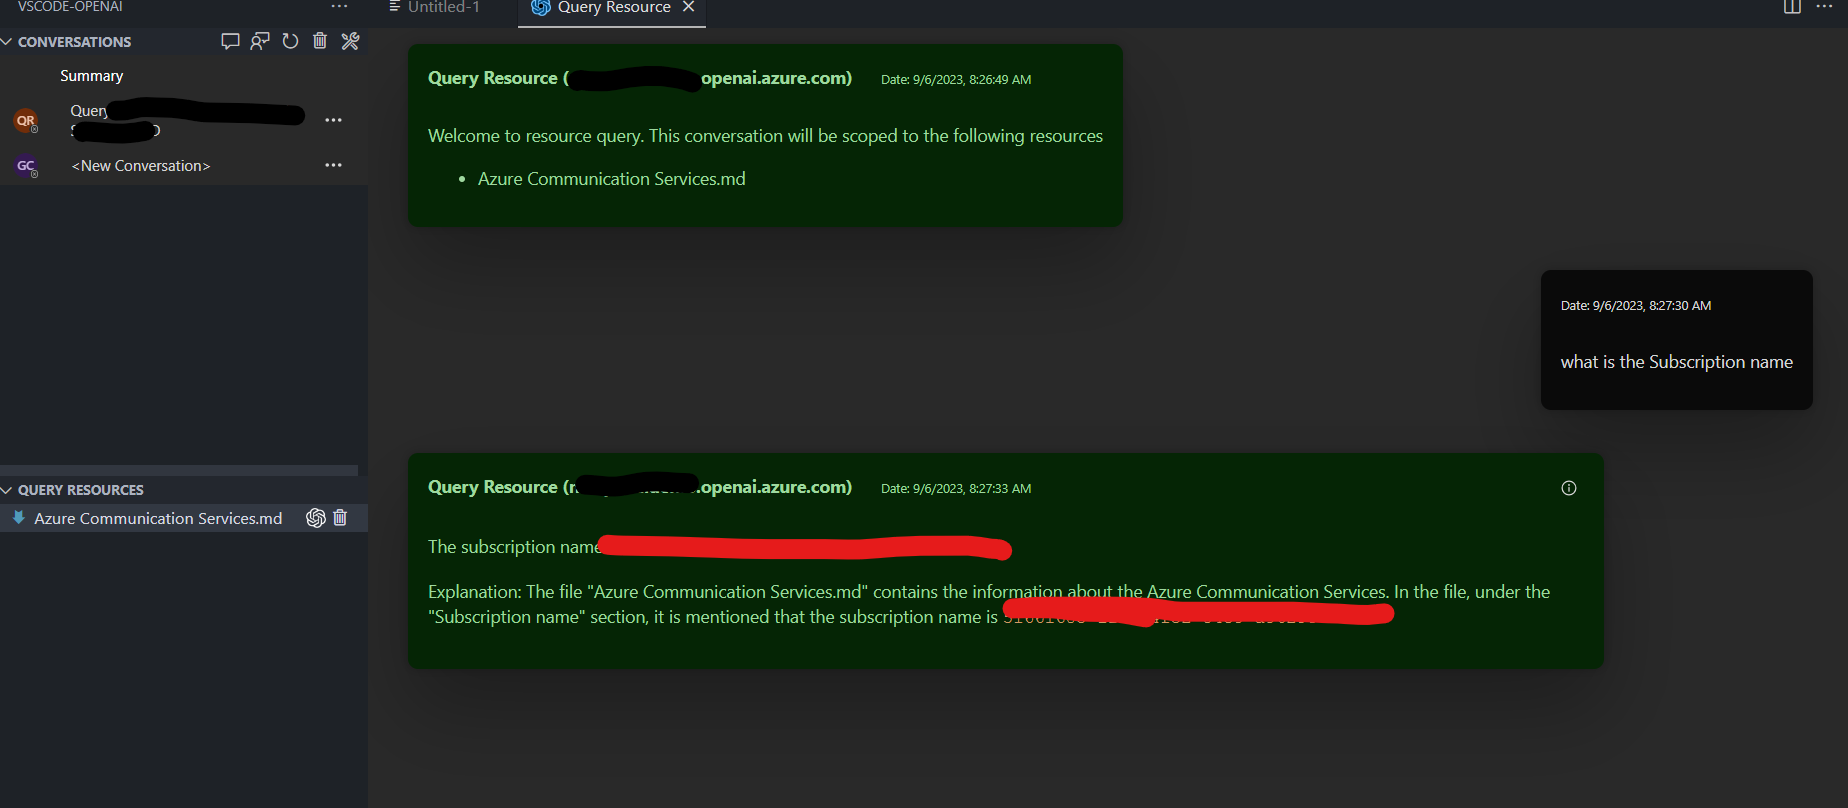
Example 2: Working with Your Own Data - Utilizing Locally Accessible Data
Conclusion
Azure OpenAI Services integrated with Visual Studio Code offers a seamless experience for developers, providing instant access to valuable insights and coding assistance. This powerful combination enables more efficient workflows, better decision-making, and enhanced productivity.


Start the conversation